
TL;DR
Most Rain Bird sprinkler head repairs come down to a clogged nozzle, a worn body, or a pressure problem, not a catastrophic failure. The nozzle and filter screen are the first things to check because clogs are the number one reason a Rain Bird head stops spraying. Rain Bird 1800 series bodies have no user-replaceable seals, so when the body fails, you swap the whole unit (about $3 for a spray head). Many “broken head” symptoms actually trace back to valve issues or pressure imbalances, so a zone-by-zone run test should always be your first diagnostic step.
Repairing a Rain Bird sprinkler head is one of the most common irrigation tasks homeowners face, and it’s usually simpler than people expect. Rain Bird’s 1800 series is the most widely installed commercial-grade spray head brand in the world, which means there’s a good chance the sprinkler causing problems in your yard is one.
The trick is knowing which part actually failed. A sprinkler head is not a single piece. It’s an assembly of separate components (body, nozzle, filter screen, riser, wiper seal), and each fails differently. This guide works as a glossary and repair reference: find your symptom, understand the terminology, and take the right action.
If you’re noticing signs your sprinklers need repair across multiple zones, the problem might be bigger than a single head. But for isolated head issues, most fixes take 20 minutes or less.
Rain Bird Sprinkler Head Types: Identify What You Have
Before you can repair a Rain Bird sprinkler head, you need to know which model you’re looking at. Using the wrong replacement creates pressure imbalances. Practitioners on irrigation forums consistently warn that a homeowner who replaced a head with one that “looked close enough” ended up with the rest of the zone underperforming. Matching the exact model matters.
1800 Series (Spray Head Body)
The workhorse of residential irrigation. The Rain Bird 1800 is a pop-up spray head available in 2“, 4“, 6“, and 12“ pop-up heights with a 1/2“ NPT female inlet. It uses interchangeable, color-coded nozzles to control spray pattern and radius. The 4“ model is by far the most common in residential lawns.
For a detailed walkthrough on fine-tuning these heads, see our guide on adjusting a Rain Bird 1800.
5000 Series (Gear-Driven Rotor)
Rain Bird’s professional-grade rotor line, designed for larger turf areas. The 5000 series covers bigger distances with adjustable arc and radius settings. These are gear-driven, meaning the rotation mechanism is internal. When a gear-driven rotor fails, the internal gears are usually the culprit, and the whole head gets replaced rather than rebuilt.
3500 Series (Compact Rotor)
A mid-range rotary head designed for even water distribution across medium to large areas. The 3500 sits between the spray coverage of an 1800 and the throw distance of a 5000.
VAN / R-VAN Nozzles
Variable arc nozzles (VAN) and rotary nozzles (R-VAN) are nozzle upgrades that fit into 1800 series bodies. The R-VAN delivers water in rotating streams instead of a fixed spray fan, which dramatically improves uniformity and reduces runoff. These nozzles are replaceable without changing the body.
Impact Heads (Maxi-Paw)
Rain Bird’s legacy impact-style heads. Unlike the 1800 series, Maxi-Paw heads can be rebuilt with parts kits, making them one of the few Rain Bird heads where a true “repair” (rather than replacement) is practical. If you have impact sprinklers not rotating, the fix is usually a spring or bearing replacement.
Key Parts and Components: What’s Actually Inside a Rain Bird Head
Understanding the anatomy of a Rain Bird sprinkler head prevents the most common DIY mistakes. These aren’t complex machines, but the parts have specific names and specific failure patterns.
Spray Body (Housing)
The in-ground cylinder that holds everything together. On the 1800 series, the body is the part threaded onto the underground fitting. When a body cracks or the internal wiper seal fails, you replace the entire body. Forum users on TheLawnForum note that Rain Bird 1800 heads have no replaceable seals, so you simply replace the entire body when it fails. This is a crucial insight that most repair articles miss.
Nozzle
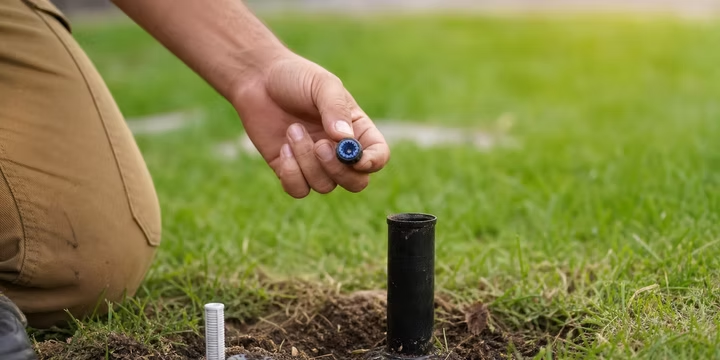
The small, removable piece at the top of the riser that creates the spray pattern. Nozzles are color-coded by radius and arc. A 15-foot, 180-degree nozzle is a different color than a 12-foot, 360-degree nozzle. This is the part that clogs most often, and it’s also the cheapest to replace (a few cents to a couple dollars).
Filter Screen
A tiny mesh screen that sits inside the riser, just below the nozzle. Its job is to catch debris before it reaches the nozzle orifice. Checking and cleaning this screen should be the first step in any Rain Bird head repair. Practitioners recommend pulling the nozzle off and flushing each head for 30 seconds, using locking pliers (with just enough pressure) to hold the stem up while water flushes through.
Wiper Seal
Rain Bird’s co-molded wiper seal on the 1800 series is considered an industry benchmark. Nearly every other brand has copied this design to some extent. The wiper seal prevents dirt and grit from entering the body as the riser retracts. Over time, especially in sandy or caliche soils, abrasive particles wear this seal down. Cap-to-body leaks on older units almost always trace back to grit contaminating the seal-to-riser interface. Because the seal is molded into the body, it can’t be replaced independently.
Riser / Stem
The pop-up shaft that extends when water pressure activates the zone. The riser carries the nozzle up to lawn level and retracts via a spring when pressure drops. A stuck riser usually means dirt has jammed the retraction mechanism.
Riser Extension (1800-EXT)
An accessory for landscapes where soil or mulch has built up over time, burying the original head too deep. Rather than digging and re-plumbing, a riser extension raises the nozzle height.
PRS (Pressure-Regulating Stem)
Rain Bird’s built-in pressure regulation technology. A PRS body maintains a consistent output of 30 PSI (or 45 PSI on some models), regardless of how high the inlet pressure runs. This matters because most sprinklers are designed to work around 30 PSI. Higher pressure causes misting and can actually reduce spray distance. A PRS body saves up to a gallon of water per minute compared to an unregulated head running at high pressure.
One practical forum tip from DoItYourself.com: Rain Bird sells pressure-regulating bodies, but installing a single pressure regulator at the valve can be cheaper and easier than replacing every head body in a zone.
SAM (Seal-A-Matic) Check Valve
A built-in check valve that prevents low-head drainage on sloped zones. Without SAM, the lowest head in a zone will continue draining water after the valve shuts off, creating puddles and wasting water.
If you’re interested in adding smart features to your system, our guide on installing a Rain Bird rain sensor covers a worthwhile upgrade.
Common Repair Terms and Symptoms: Diagnose Before You Dig
When a Rain Bird head acts up, the symptom points to the cause. Here’s a glossary of the most common problems you’ll encounter when you need to repair a Rain Bird sprinkler head, along with what each one actually means.
Clogged Nozzle
The number one reason a Rain Bird head stops spraying properly. Dirt, grass clippings, and mineral buildup (especially in hard water areas) block the nozzle orifice. The fix is straightforward: remove the nozzle, soak it in white vinegar for 30 minutes, and clear the opening with a thin wire or toothpick. Always check the filter screen at the same time.
For a deeper walkthrough, see our article on how to fix clogged sprinkler heads.
Misting
When water comes out as a fine fog instead of defined streams, the pressure is too high. Misting wastes water, reduces throw distance, and drifts in wind. The fix is either a PRS body or a pressure regulator at the valve. Ideal pressure for Rain Bird systems ranges between 30 and 50 PSI.
If misting is happening across an entire zone, the issue is system pressure, not a single head. Our guide on fixing low water pressure in sprinklers covers the diagnostic steps (which also apply in reverse when pressure runs too high).
Low-Head Drainage
Water pooling around the lowest sprinkler head after a zone shuts off. This isn’t a broken head. It’s gravity pulling residual water through the piping to the lowest point. The fix is a SAM (check valve) body at the affected locations. Irrigation pros on LawnSite forums point out that the hissing sound after a zone shuts off is often low-head drainage, with another sprinkler head lower in the line sucking in air, not a mechanical failure.
Head Won’t Pop Up
Three possible causes: debris jamming the body, a worn internal spring, or low system pressure. Start by pulling the nozzle, flushing the body, and checking whether the riser moves freely by hand. If the riser slides smoothly but won’t pop up under pressure, the problem is upstream (valve not fully opening, pipe leak reducing pressure, or a municipal supply issue).
Leaking at the Base
Water seeping from the connection between the head body and the underground fitting. The most common causes: a worn wiper seal, a cross-threaded fitting, or missing Teflon tape. Cross-threading is one of the most frequent homeowner mistakes when replacing Rain Bird heads, according to irrigation professionals on LawnSite. The plastic threads are delicate. Hand-tighten only, never use a wrench on the body itself.
If you suspect the leak might be underground rather than at the head, our guide on how to find a leak in a sprinkler system walks through the full diagnostic process.
Overspray / Misalignment
The head works fine, but water is hitting the sidewalk, house, or fence instead of the lawn. This is an adjustment issue, not a repair. On 1800 series spray heads, the entire body can be rotated to aim the nozzle correctly. On 5000 series rotors, the arc and radius are adjustable with a flat-head screwdriver or the Rain Bird adjustment tool.
Head Won’t Retract
Dirt or pebbles jammed between the riser and the body wall prevent the spring from pulling the stem back down. Pull the riser up, clean around the seal area, flush the body, and the retraction should restore. If the spring is broken (rare but possible), replace the body.
Dripping When the System Is Off
This one confuses homeowners the most. A sprinkler head that drips when no zone is running often points to a valve problem, not a head problem. According to irrigation experts on JustAnswer, if a valve isn’t fully closing due to internal wear, debris, or a faulty diaphragm, it allows a small amount of water to continue flowing. The head is just where the symptom appears.
If you suspect a valve issue, our valve troubleshooting guide covers the diagnosis.
Step-by-Step Rain Bird Head Repair Reference
How to Clean a Clogged Rain Bird Nozzle
- Turn off the zone (at the controller or by manually closing the valve).
- Grip the top of the head and pull the riser up. Remove the nozzle by twisting it counterclockwise or pulling it straight off (depending on model).
- Remove the filter screen from inside the riser.
- Soak the nozzle and screen in white vinegar for 20 to 30 minutes.
- Use a thin wire, toothpick, or compressed air to clear any remaining debris from the nozzle orifice.
- Reassemble and run the zone to confirm proper spray pattern.
How to Replace a Rain Bird Spray Head Body
- Turn off the water supply to the zone.
- Dig carefully around the head to expose the fitting below. Leave a few inches of clearance on all sides.
- Unscrew the old body counterclockwise from the riser or swing joint fitting. If it’s stuck, use channel-lock pliers gently on the body, not the fitting below.
- Clean the threads on the fitting. Apply 3 to 4 wraps of Teflon tape (plumber’s tape) clockwise on the male threads.
- Thread the new Rain Bird body onto the fitting by hand. Hand-tighten only, then give it a quarter turn with pliers at most. Over-tightening cracks plastic fittings.
- Before installing the nozzle, turn the water back on and flush the new body for 2 to 5 minutes. This clears dirt and pipe debris that would immediately clog a new nozzle.
- Install the filter screen, then the nozzle. Adjust the head direction.
- Backfill dirt around the head, making sure it sits level with the surrounding turf.
The actual cost of a replacement spray head and nozzle is about $3. A rotary head runs about $15.
How to Adjust Arc and Radius
Spray heads (1800 series with fixed nozzles): The arc is determined by the nozzle type (quarter, half, full, or variable). To change the arc, you swap the nozzle. Radius is adjusted with a small flat-head screwdriver inserted into the radius reduction screw on top of the nozzle. Turning clockwise reduces throw.
Rotors (5000 series): Arc is adjustable from 40 to 360 degrees using Rain Bird’s adjustment tool or a flat-head screwdriver. Insert the tool into the adjustment socket on top and turn. Radius is reduced by turning the radius screw clockwise.
How to Flush After Replacement
This step gets skipped constantly, and it’s why new heads clog within days. After connecting a new body, always run the zone for 2 to 5 minutes with the nozzle removed. One forum user on TheLawnForum shared that simply unscrewing the spring and head, flushing the zone, and cleaning the cap was enough to fix a persistent leak that seemed to require a full replacement.
DIY vs. Professional Rain Bird Sprinkler Head Repair
When to DIY
These tasks are straightforward for any homeowner with basic tools:
- Cleaning or swapping a clogged nozzle
- Replacing a filter screen
- Adjusting spray direction or radius
- Replacing a single spray head body ($3 in parts, 20 minutes of work)
- Installing Teflon tape on a leaking connection
When to Call a Professional
Certain patterns indicate the problem goes beyond a single Rain Bird sprinkler head repair:
- Multiple heads failing in the same zone. This almost always points to a valve or pressure issue, not individual head failure.
- Persistent leaking after you’ve already replaced the head. The leak is likely underground or at the valve.
- Misting across an entire zone. System pressure needs professional diagnosis and regulation.
- A zone that won’t turn on at all. The problem is the controller, wiring, solenoid, or valve, not the heads.
- Dripping when the system is off. Likely a valve that isn’t seating properly.
A practitioner blog from a professional irrigation company notes that in a large percentage of service calls, the “leak” homeowners fear is actually spray misdirection from heads that are tilted, clogged, or aimed wrong. A proper zone-by-zone run test catches this before any parts get replaced unnecessarily.
Cost Comparison
Doing the repair yourself, a Rain Bird spray head and nozzle costs roughly $3. A rotary head runs about $15. Professional sprinkler head replacement costs $59 to $150 per head, with the labor rate typically falling between $56 and $115 per hour plus a travel fee.
For more complex valve issues, our sprinkler valve repair cost guide breaks down what to expect.
Pro Tips and Common Mistakes
Don’t use the wrong model. Every Rain Bird head in a zone should match in precipitation rate. Mixing a 5000 series rotor with 1800 series spray heads on the same zone guarantees uneven coverage because they apply water at completely different rates.
Rain Bird 1800 bodies are replace-only. The co-molded wiper seal is not a serviceable part. When the seal fails and you see water leaking between the cap and body, swap the whole body. At $3 per head, there’s no reason to attempt a seal repair that doesn’t exist.
Always flush before installing the nozzle. Pipe debris, sand, and dirt sitting in the line will clog a new nozzle within the first cycle. Two to five minutes of flushing with the nozzle removed prevents this entirely.
Hissing after shutoff is not a broken head. That sound is low-head drainage, specifically air being sucked into the lowest head as water drains by gravity. A SAM check valve body at the affected locations solves it.
Hard water areas demand seasonal maintenance. In West Texas and similar regions with alkaline hard water, mineral deposits build up on filter screens and inside nozzles faster than in softer-water areas. Sandy and caliche soils also accelerate wiper seal wear through abrasion. Cleaning filters and nozzles at least twice per season is not optional, it’s preventative maintenance.
For a complete seasonal approach, our West Texas sprinkler maintenance guide covers everything from spring startup to fall adjustments.
Rain Bird sprinkler heads can last up to 15 years with proper care. But factors like high pressure, sandy soil, debris, UV exposure, and lawn mower strikes all shorten that lifespan. Regular inspection is the cheapest form of irrigation maintenance.
One irrigation pro on LawnSite mentioned that he does a lot of repairs on homeowner-installed systems where cutoff nipples were used as a quick fix instead of proper swing joints. These work short-term but create rigid connections that break more easily from foot traffic or mower impact.
When Repair Isn’t Enough
Sometimes a Rain Bird sprinkler head repair reveals a bigger problem. If you’re replacing the same heads repeatedly, finding leaks in multiple zones, or dealing with chronically low pressure, the system needs a professional evaluation, not another nozzle swap.
A full system checkup identifies the root cause, whether it’s aging valves, undersized piping, pressure regulation issues, or a design flaw that no amount of head replacement will fix.
Check your sprinkler system for problems with a professional who can diagnose zone by zone and prioritize what actually needs attention.
Frequently Asked Questions
Why is my Rain Bird sprinkler head not popping up?
The three most common causes are debris jammed in the body, a worn retraction spring, or low water pressure reaching the head. Start by removing the nozzle and checking whether the riser moves freely by hand. If it slides smoothly but won’t pop up when the zone runs, the pressure issue is upstream at the valve or mainline.
Can I replace just the nozzle on a Rain Bird 1800?
Yes. The nozzle is a separate, removable piece that twists or pulls off the top of the riser. Rain Bird nozzles are color-coded by radius and arc pattern, so match the replacement to your coverage needs. You do not need to replace the body just because the nozzle is clogged or damaged.
How do I know which Rain Bird sprinkler head model I have?
Look at the head cap when it’s retracted. Rain Bird stamps the model number on the top or side of the body. The 1800 series will say “1800” and show the pop-up height. The 5000 series is noticeably larger with a visible arc adjustment socket on top. If the head is an impact type with a swinging arm, it’s likely a Maxi-Paw.
Why does my Rain Bird sprinkler leak when the system is off?
A head that drips with no zone running usually points to a valve that isn’t fully closing, not a head defect. Debris on the valve diaphragm, a worn seal, or a failing solenoid can allow a trickle of water to pass through. Low-head drainage (gravity pulling water to the lowest head in a zone) is another common cause and is solved with a SAM check valve body.
How long do Rain Bird sprinkler heads last?
With proper maintenance, Rain Bird heads can last up to 15 years. In practice, high pressure, sandy or caliche soils, hard water deposits, and lawn mower damage all reduce that lifespan. In West Texas specifically, seasonal filter cleaning and occasional body replacements keep systems running well long-term.
Is it cheaper to repair or replace a Rain Bird sprinkler head?
For the 1800 series, replacement is almost always the right move because the body costs about $3 and the internal wiper seal can’t be replaced independently. Impact heads like the Maxi-Paw can be rebuilt with parts kits, making repair cost-effective. Professional replacement runs $59 to $150 per head, so DIY body swaps offer significant savings.
What pressure should my Rain Bird sprinklers run at?
The ideal operating range is 30 to 50 PSI. Most Rain Bird spray heads are designed to perform best around 30 PSI. Anything above 50 PSI causes misting, reduces throw distance, and accelerates seal wear. A pressure-regulating stem (PRS) body or an inline pressure regulator solves high-pressure problems.
Can I mix different Rain Bird head types on the same zone?
It’s strongly discouraged. Spray heads and rotors have very different precipitation rates. Mixing them on the same zone means some areas get drenched while others stay dry. Every head on a zone should deliver water at the same rate for uniform coverage.