How to Check Sprinkler System for Problems (2026 Guide)
- M&M Sprinklers Team
- 5 days ago
- 13 min read
TL;DR
A single broken sprinkler head can waste 25,000 gallons of water per year. This 12-point checklist walks you through every major component of your irrigation system, from the controller to the backflow preventer, in about 30 minutes. Each item includes what to look for, what it means, and whether you can fix it yourself or need a professional. If you’re in Lubbock or West Texas, pay extra attention to hard water buildup, wind drift, and freeze damage, because those three factors accelerate almost every problem on this list.
Why Checking Your Sprinkler System for Problems Matters More Than You Think
A cracked pipe or busted head hiding in your yard doesn’t announce itself. It just runs. According to the EPA, cracks in pipes and broken sprinkler heads can waste up to 25,000 gallons of water and $280 over a single six-month irrigation season. Scale that across a few years of neglect and you’re looking at serious money down the drain, literally.
In Lubbock and the broader West Texas region, the stakes are even higher. Outdoor water use accounts for more than 30% of total household water consumption nationally, but in arid regions it can hit 60%. Combine that with Lubbock’s notoriously hard water (which accelerates mineral buildup in nozzles and valves), persistent wind that blows mist off target, and temperature swings from winter freezes to triple-digit summers, and you have an environment that punishes neglected sprinkler systems fast.
The good news: a systematic inspection catches the vast majority of common problems before they become expensive disasters. This checklist follows the order you’d actually walk through your system, starting at the controller indoors and working outward zone by zone. If you’re turning your system on after winter, our Lubbock spring startup checklist pairs well with this guide.
At-a-Glance: 12-Point Sprinkler System Inspection Checklist
Now let’s walk through each one.
1. Start at the Controller: Power, Display, and Programming
The controller is the brain of your sprinkler system. Every inspection should begin here because a programming error or power failure affects every zone downstream.
What to check:
Confirm the unit is plugged in and the display is lit. If the screen is blank or flickering, check the outlet first, then the controller’s backup battery (a dead 9V battery can cause erratic behavior).
Look for error codes or fault indicators on the display. Most modern controllers will flag a shorted zone wire or communication error.
Review the programmed schedule. Does it match the current season and your city’s watering ordinances? In Lubbock, the Stage 1 conservation plan restricts landscape watering to specific days. An outdated winter schedule running in July wastes water and money.
Open the controller enclosure and wipe it out. Bees, wasps, mud daubers, and spiders commonly nest inside outdoor electrical boxes in West Texas, and they can chew through or corrode wiring.
What it means: A controller that won’t power on at all could have a blown fuse, a shorted wire from a bad solenoid, or a fried circuit board. If your system won’t turn on after basic power checks, that usually requires professional diagnosis.
DIY or pro? Replacing a battery, adjusting a schedule, and cleaning out pests are all DIY. A blank display, repeated error codes, or electrical faults point to a pro job.
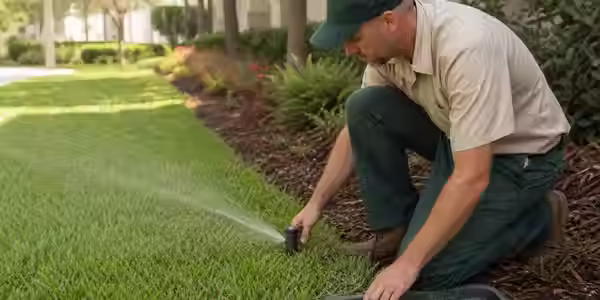
2. Run Each Zone Manually and Walk the Yard
This is the core of how you check a sprinkler system for problems. No amount of guessing from the patio replaces walking each zone while it’s running.
What to do:
Go to your controller and start zone 1 manually. Walk the entire coverage area while it runs. The first 30 to 60 seconds reveal the biggest issues: broken heads shooting geysers, valves that don’t open, and dry spots where nothing is spraying. Use your phone to take photos of every problem you find, or drop small landscape flags so you can come back to them.
Repeat for every zone. Yes, every one. A system with 8 zones takes about 15 minutes if you’re moving quickly.
What to look for:
Heads that don’t pop up at all
Heads spraying in the wrong direction
Geysers from broken housings
Soggy areas or pooling water
Dry patches that should be getting coverage
Zones that simply don’t activate
Practitioners on Reddit and in local Lubbock forums frequently note that spring is the worst time to get a repair appointment because everyone turns their system on at once and discovers problems simultaneously. Running this walkthrough in late February or early March, before peak season, gives you a head start.
DIY or pro? This step is pure observation. What you find during the walk determines everything else.
3. Inspect Sprinkler Heads for Damage, Clogs, and Alignment
Sprinkler heads take a beating. Mower strikes, UV degradation, foot traffic, and West Texas’s hard water all contribute to premature failure.
What to check:
Physical damage: Look for cracked housings, chipped nozzles, and heads that lean to one side. Broken sprinkler heads are usually easy to spot because you’ll see uneven water distribution or a complete failure to pop up.
Clogs: Sand, dirt, and mineral deposits can block the nozzle. A clogged head often won’t rise or will produce a weak, misshapen spray. Irrigation specialists consistently point to mineral buildup and debris as the top causes of early sprinkler head failure, and Lubbock’s hard water makes this worse than average.
Height: A head sitting too low gets buried by grass growth and can’t spray properly. Too high and it becomes a trip hazard that breaks easily under mower wheels. Heads should sit flush with the soil surface and stand vertical when extended.
DIY or pro? Cleaning a clogged nozzle with a screwdriver or replacing a broken sprinkler head are straightforward DIY tasks. Repositioning heads or replacing damaged risers underground may require a professional, especially if the head needs to be moved to correct coverage.
4. Check Spray Patterns for Overspray, Misting, and Gaps
Even if every head works, the pattern might be wrong. This is one of the most overlooked steps when homeowners check their sprinkler system for problems.
What to look for:
Overspray onto hardscapes: Are you watering your driveway, sidewalk, or house siding? Irrigation water landing on concrete goes straight to the storm drain. Any head spraying onto a hardscape should be redirected toward the landscape.
Misting: Fine mist instead of defined streams usually means water pressure is too high. In Lubbock, where average wind speeds exceed 12 mph, misting is particularly wasteful because those tiny droplets blow away before reaching the ground.
Coverage gaps: Each sprinkler should throw water far enough to reach the next head in the zone. This principle, called head-to-head coverage, ensures uniform watering. If you see dry strips between heads, the nozzles may be wrong or the heads may have shifted.
Most “dry spots” in a lawn are caused by misaligned heads or incorrect nozzle patterns, not lack of watering time. Homeowners often default to increasing run times when the real fix is adjusting the arc and radius.
DIY or pro? Minor arc and radius adjustments are DIY with a flat-head screwdriver. System-wide coverage gaps that persist after adjustments suggest a design problem that needs professional assessment.
5. Test Water Pressure (The Gauge Test)
Pressure problems are sneaky. Too low and heads won’t pop up fully or throw far enough. Too high and you get misting, premature wear on seals, and leaks at fittings.
How to test:
Attach a hose-bib pressure gauge (available at any hardware store for about $10) to an outdoor faucet. Turn the faucet on fully. The reading you get with no other water running is your static pressure. Then run a zone and read it again, that’s your dynamic pressure. Most residential sprinkler systems operate best between 40 and 65 PSI.
If your reading is below 40 PSI, heads may not retract properly and coverage will be short. Above 65 PSI and you’ll see misting, blown fittings, and accelerated component wear. For a deeper explanation, our water pressure guide covers testing and fixes in detail.
DIY or pro? The gauge test itself is easy DIY. Installing or adjusting a pressure regulator to bring pressure into the correct range is a pro job.
6. Look for Leaks: Underground, at Heads, and at Fittings
Leaks are the single most expensive sprinkler problem because they run continuously and hide easily. The EPA estimates that 30% to 60% of sprinkler water is wasted due to poor scheduling, misalignment, and leaks.
Where to look:
At the heads: Water bubbling up around the base of a head while the zone runs means the seal between the head and the riser or fitting is compromised.
At fittings and joints: Leaking joints can signal excessive pressure or sediment damage. Check any visible connection points above ground.
Underground: If you see a wet, soggy line running between sprinkler heads (especially when the system is off), that’s a classic sign of a cracked underground pipe. Since you can’t see the damage at the surface, these leaks can run for days without anyone noticing.
Practitioners on forums frequently report that valve boxes are a major source of hidden water waste. Even a small leak at a valve can seep continuously without visible evidence on the lawn surface.
DIY or pro? A leaking head or a loose fitting above ground can often be fixed DIY. Underground leaks almost always require a pro with leak detection experience.
7. Do the Water Meter Test (Confirms Hidden Leaks)
This is the definitive way to confirm whether your system has a hidden leak, and it costs nothing.
How to do it:
Turn off every water-using device in your home. Dishwasher, washing machine, ice maker, everything. Go to your water meter (in Lubbock, it’s typically in a box near the curb at the front of your property). Write down the reading. Wait two hours without using any water. Check the meter again.
If the reading changed at all, you have a leak somewhere. It could be the sprinkler system, a toilet, or an interior pipe, but it narrows the search dramatically.
DIY or pro? Running the test is DIY. Finding the source of a confirmed leak and repairing it is typically a professional job, especially if the leak is in the irrigation system’s underground piping.
8. Run the Catch-Cup Uniformity Test
This is the single most useful diagnostic a homeowner can perform, and almost no one does it. It tells you whether your lawn is actually getting even water or whether some areas are getting soaked while others go dry.
How to do it:
Place 6 to 10 identical cups (tuna cans work great) evenly across one zone. Run that zone for exactly 10 minutes. Then compare the water levels in each cup.
Similar levels across all cups = good distribution.
Some cups nearly empty = coverage gaps from misaligned heads or wrong nozzles.
Some cups dramatically fuller than others = overspray, a broken nozzle, or a head that’s spraying in the wrong direction.
This is the only objective, quantifiable measurement a homeowner can do without professional equipment. It turns “I think there might be a dry spot” into hard data.
DIY or pro? The test is completely DIY. Resolving the uniformity issues it reveals, whether that means swapping nozzles, repositioning heads, or redesigning a zone, may require professional help depending on the severity.
9. Inspect Valve Boxes for Standing Water and Damage
Valve boxes sit below ground level and are easy to forget about. Pop the lid off every valve box in your yard and look inside.
What to check:
Standing water: If the box is flooded when the system hasn’t run recently, you likely have a leaking valve, a cracked fitting, or a failed diaphragm. This is one of the most common repair categories because the problem stays hidden until water bills spike.
Connections: Make sure all valves and components are securely connected. If a valve can’t close completely, your system will slowly seep water even when turned off.
Solenoid condition: A bad solenoid can cause water to leak continuously out of heads (if stuck open) or block water entirely (if stuck closed). Look for corrosion, cracking, or visible damage on the solenoid body. Our solenoid troubleshooting guide covers the diagnosis process in more detail.
DIY or pro? Opening the box and looking is DIY. Valve repair, diaphragm replacement, or solenoid swaps can range from intermediate DIY to a job best left to a professional, depending on your comfort level with plumbing.
10. Check the Backflow Preventer
This one matters more than most homeowners realize, especially in Lubbock. A backflow preventer keeps irrigation water (which may contain fertilizer, pesticides, or soil bacteria) from flowing backward into the city’s drinking water supply.
What to check:
Look for visible dripping, cracks, or corrosion on the device body.
Check for freeze damage. In West Texas, where temperatures can swing from 70°F to below freezing in a single day, brass and plastic backflow components crack regularly.
Confirm that all test cocks and shutoff valves are in their correct positions.
The City of Lubbock requires annual backflow testing by a licensed tester. Texas law mandates that only a licensed Backflow Prevention Assembly Tester (BPAT) can perform the official test and issue the certification. A homeowner’s visual inspection is valuable for catching obvious problems, but it doesn’t replace the certified test.
DIY or pro? Visual inspection is DIY. Testing, certification, and any repair work must be done by a licensed BPAT tester.
11. Test Your Rain/Freeze Sensor
A rain/freeze sensor is a small device connected to your controller that prevents the system from running during rain or freezing temperatures. It’s an inexpensive way to prevent waste and freeze damage, but only if it actually works.
How to test it:
Most sensors have a disc or spindle that swells when wet. Manually compress the disc (or pour water over it) and see if the controller shows a “sensor active” or “rain delay” indicator. If nothing happens, the sensor may be failed, disconnected, or wired incorrectly.
Alternatively, use the bypass switch on your controller to toggle the sensor on and off. If the system behaves the same either way, the sensor isn’t communicating.
If your system doesn’t have a rain/freeze sensor at all, adding one is a relatively simple upgrade that pays for itself quickly in water savings. Modern Wi-Fi controllers like the Hunter Hydrawise can incorporate weather data automatically, taking this a step further.
DIY or pro? Testing a sensor is DIY. Installing a new wireless sensor can be DIY for handy homeowners or a quick professional add-on.
12. Listen for Unusual Noises
A well-designed sprinkler system runs quietly. If you hear something strange while zones are operating, pay attention.
What different sounds mean:
Hissing or whistling: Usually indicates a leak or crack in the line near the valve or at a fitting. Air escaping through a small gap creates this sound.
Banging (water hammer): A loud thump when a zone shuts off typically means the valve is closing too quickly. This stresses pipes and fittings over time.
Gurgling: Often points to air trapped in the line, commonly after a winterization blowout or when a line has been recently repaired.
High-pitched screeching: Almost always a small leak or crack under pressure.
Strange sounds aren’t the most urgent problem by themselves, but they’re early warning signs of greater issues. Catching them now can prevent a $300+ repair bill later.
DIY or pro? Listening is DIY. Diagnosing and fixing the source of the noise almost always requires a professional with experience tracing pressure and flow anomalies.
Bonus: Check Your Controller Box for Pests
This deserves a mention because it’s universally overlooked. Open your controller enclosure and look for insect activity. In West Texas, mud daubers and fire ants are particularly aggressive about colonizing outdoor electrical boxes. They build nests on and around wiring connections, which leads to corrosion, short circuits, and zone failures.
Wipe out the enclosure, clear any nests, and check wire connections for damage while you’re in there. If wiring is chewed or corroded, that’s a professional repair.
When to Call a Professional (and When to Handle It Yourself)
After running through this checklist, you’ll have a clear picture of your system’s condition. Here’s the decision framework.
You can handle it yourself:
Cleaning clogged nozzles
Replacing broken sprinkler heads
Adjusting spray arcs and radius
Reprogramming the controller
Running the water meter test and catch-cup test
Cleaning pests from the controller box
Testing the rain/freeze sensor
Call a professional for:
Underground leaks
Zones that won’t activate after troubleshooting
Valve replacement or solenoid wiring issues
Pressure regulation installation
Backflow preventer testing and certification
System-wide coverage redesign
Controller electrical faults
Any repair involving digging into main lines
Professional sprinkler repairs typically cost between $130 and $410, with average costs around $300 depending on the specific problem. That’s a fraction of what unchecked water waste costs over a full season.
There are some things homeowners can do confidently, like debris removal and head swaps. But fixing a damaged line, moving spray heads, or changing controller wiring can cause more harm than good without the right tools and experience.
For a full breakdown of what different repairs cost, see our repair costs and fixes guide.
West Texas Factors That Make Regular Inspections Critical
If you live in Lubbock, Levelland, Plainview, or anywhere in West Texas, your sprinkler system faces challenges that homeowners in milder climates simply don’t deal with.
Hard water mineral buildup. Lubbock’s water is extremely hard. Calcium and magnesium deposits accumulate inside nozzles, on screen filters, and around valve seats. Semi-annual head cleaning isn’t optional here; it’s necessary to prevent premature failure.
Wind drift. With average wind speeds above 12 mph, any head producing fine mist is essentially throwing water away. Pressure-regulated heads and matched precipitation nozzles make a measurable difference.
Freeze-thaw cycles. West Texas doesn’t get long, consistent winters. It gets sudden freezes that crack backflow preventers, split exposed pipes, and damage valve internals. Then it warms up and the damage starts leaking.
Caliche soil. The calcium-rich hardpan common across the region drains poorly. Overwatering from a broken head or stuck valve doesn’t just waste water; it creates standing water that suffocates roots and promotes fungal problems.
A well-maintained irrigation system can last 20 to 25 years. But in this climate, that lifespan depends entirely on consistent inspection and maintenance. Following a regular maintenance schedule reduces annual water use by up to 30% while extending system life.
If you need professional sprinkler repair in Lubbock, getting it handled early in the season beats waiting until every irrigation company in town is booked solid.
Frequently Asked Questions
How often should I check my sprinkler system for problems?
At minimum, twice a year: once when you start the system in spring and once before winterization in fall. In West Texas, a mid-summer check is also smart because heat stress and hard water buildup accelerate wear during June through August.
What is the catch-cup test and why should I do it?
Place 6 to 10 identical containers across a zone, run it for 10 minutes, and compare water levels. This is the only way to objectively measure whether your system distributes water evenly. Uneven levels point to clogged nozzles, misaligned heads, or design flaws you’d never notice just by watching.
Can a sprinkler leak really waste 25,000 gallons a year?
Yes. The EPA reports that a single broken head or cracked pipe can waste up to 25,000 gallons over a six-month season. A broken head alone can lose roughly 80 gallons per day, which adds up to about 2,400 gallons per month.
How do I know if my sprinkler problem is DIY or needs a professional?
Anything you can see and access on the surface (clogged nozzles, broken heads, arc adjustments, controller programming) is generally DIY. Anything underground, anything involving electrical wiring in the valve system, or anything requiring compliance certification (like backflow testing) should go to a licensed professional.
Does Lubbock require backflow preventer testing?
Yes. The City of Lubbock requires annual testing of backflow prevention assemblies on irrigation systems connected to the municipal water supply. Only a licensed BPAT tester can perform the test and issue the required certification.
What causes low water pressure in a sprinkler system?
Common causes include a partially closed main shutoff valve, a leaking pipe reducing flow, too many heads on one zone, a failing pressure regulator, or municipal supply issues. Our low water pressure fix guide walks through each cause and solution.
Will a smart controller help me catch problems automatically?
Modern Wi-Fi controllers with flow sensors can detect unusual water usage patterns, alert you to probable leaks or broken heads, and adjust watering schedules based on local weather data. They won’t replace a physical inspection, but they catch problems between inspections that would otherwise go unnoticed for weeks.
How much does a professional sprinkler inspection cost?
Costs vary by provider and system size, but most professional system checkups in the Lubbock area involve running each zone, inspecting for leaks and coverage problems, checking backflow status, and recommending efficiency improvements. It’s significantly cheaper than the water waste and landscape damage that unchecked problems cause over a full season.


Comments