
TL;DR
Sprinkler lines gushing water when turned off usually point to one of three problems: low head drainage (gravity pulling water to the lowest sprinkler), a leaking zone valve (debris or torn diaphragm preventing a seal), or a broken main line (constant pressure pipe that leaks whether the system runs or not). Low head drainage stops on its own. A leaking valve runs 24/7 and wastes 50 to 300 gallons daily. A main line break is an emergency that requires shutting off water immediately.
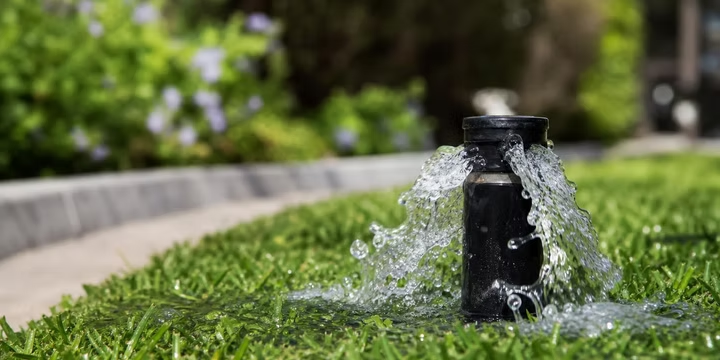
You walk outside and water is pooling around your sprinkler heads. The controller is off. Nobody turned the system on. Yet water keeps flowing, maybe trickling, maybe gushing, and you have no idea why.
This is one of the most common irrigation problems homeowners face, and also one of the most misunderstood. The cause could be harmless gravity drainage that stops on its own, or it could be a serious pipe break wasting thousands of gallons a month. The difference matters, both for your water bill and for preventing landscape damage.
This guide walks through every component and condition that causes sprinkler lines to gush water when turned off. Each term is defined in plain language so you can diagnose what you’re seeing, understand the parts involved, and decide whether this is a quick DIY fix or a call to a professional.
If your system is actively flooding your yard right now, get professional repair help before reading further.
Quick Diagnosis: What Are You Looking At?
Before reading the full glossary, use this table to narrow down your problem fast.
The rest of this article explains each of these causes in detail, defines the parts involved, and tells you what to do about each one.
Glossary of Causes, Parts, and Fixes
Low Head Drainage
The single most common reason for sprinkler lines gushing water when turned off, and also the least dangerous.
Low head drainage happens when residual water in the pipes drains downhill by gravity after the zone finishes its cycle. The water finds the lowest sprinkler head on the zone and flows out of it until the pipes are empty or pressure equalizes. This can take anywhere from a few minutes to several hours depending on how much pipe is in the ground and how much elevation change exists.
For every 1 foot of elevation change, 0.433 PSI of pressure is generated. On hilly properties or even gently sloped yards, that pressure pushes a surprising volume of water out of the lowest heads.
How to tell it apart from a real leak: Low head drainage stops. It might take a while, but eventually the water flow tapers off and quits. If water runs from the lowest sprinkler heads around the clock, every day, the problem is something else (almost always a leaking valve). A classic visual clue that you’re dealing with a valve leak rather than drainage is moss or algae growing on nearby sidewalks from constant moisture, or puddles around the lowest heads that never dry out.
Zone Valve (Diaphragm Valve)
The zone valve is the gatekeeper for each irrigation zone. When the controller sends an electrical signal, the valve opens and water flows to that zone’s sprinkler heads. When the signal stops, the valve closes and water stops.
If this valve doesn’t seal completely, water continues to seep or gush through it even when the system is off. This is the second most common cause of water flowing from sprinkler lines when turned off, and unlike low head drainage, it never stops on its own.
According to Hunter Industries, the most common reason for a valve to remain on or weep is debris. New installations without proper flushing, recent main line repairs, and well water systems are all prone to pushing sediment into the valve where it gets trapped between the diaphragm and the valve seat.
A leaking valve can waste 50 to 300 gallons daily, often without you noticing until the water bill arrives. That can add $15 to $100 or more per month in wasted water alone.
For a deeper walkthrough on diagnosing and repairing valve problems, see our solenoid valve troubleshooting guide.
Diaphragm
The diaphragm is the rubber or silicone membrane inside the zone valve. It presses against the valve seat to create a watertight seal that stops water flow. When the diaphragm is torn, warped, perforated, or clogged with debris, the valve can’t close fully, and water pushes through.
What to check: The diaphragm should be clean and free of wrinkles, tears, or perforations. The seal surface should have no nicks, dents, or abrasions. The diaphragm spring should be intact and bounce back when compressed.
Practitioners on DIY forums frequently report that simply cleaning the diaphragm and valve body with a toothbrush and water resolves the problem. Dirt or sediment blocking the valve open is far more common than actual diaphragm failure. However, if water is visibly weeping out of the valve body itself (not through the sprinkler heads), the diaphragm is likely damaged and should be replaced. Sometimes the hole or crack is too small to see during inspection.
Safety warning: Hunter Industries warns that you should shut off the main water supply before opening a valve. Opening a valve under pressure is dangerous and can cause injury. Always depressurize the system first.
Solenoid
The solenoid is the electromagnetic actuator mounted on top of the zone valve. It’s a small cylinder with two wires coming out of it. When the controller sends power through those wires, the solenoid opens the valve. When power stops, the solenoid releases and the valve closes.
If you find sprinkler lines gushing water when turned off, one possibility is that the solenoid has been manually opened. Solenoids can be twisted counterclockwise to open the valve manually (useful during testing or repairs). If someone did this and forgot to close it, water will flow continuously through that zone.
Fix: Locate your valve box, find the solenoid on top of the valve, and turn it clockwise until snug. Don’t overtighten.
A valve that won’t close even with the solenoid tightened may have a stuck or faulty solenoid coil. Even if the valve body is clean, an internal short or mechanical failure in the solenoid can prevent disengagement. One DIY forum user described cleaning their valve thoroughly but still seeing the valve gush water and sprinkler heads shooting when the solenoid was screwed in tightly. They ultimately had to swap solenoids from a working valve to confirm the part was bad, and then called a professional.
If you need to test or replace a solenoid, a multimeter can help confirm whether the coil is functional.
Bleed Screw
A small screw on the valve body that, when opened, allows water to bypass the solenoid for manual operation. It’s one of the simplest and most overlooked causes of sprinkler lines gushing water when turned off.
If the bleed screw is loose or partially open, the valve will pass water constantly. The fix is straightforward: hand-tighten the bleed screw. Don’t use tools, finger-tight is enough. Over-tightening can strip the threads or crack the valve body.
This is worth checking before you start disassembling anything. Many homeowners tear apart a perfectly good valve when the real problem was a quarter-turn of a small screw.
Main Line (Constant Pressure Line)
The main line runs from the backflow preventer to the individual zone valves. It carries water under full municipal pressure at all times, whether or not the sprinkler system is running. This is the pipe that’s always “on.”
A break in the main line means water flowing continuously, 24 hours a day, regardless of what the controller is doing. The flow may be large enough to erode a hole in the soil or create a constant wet spot. This is the most urgent cause of water gushing from sprinkler lines when the system is turned off.
How to identify it: If you see water pooling both when the system is running and when it’s off, suspect a main line break. If pooling only occurs when a specific zone runs, the break is more likely in a lateral line (see below).
A leak the width of a dime in an underground sprinkler line can waste 6,300 gallons of water per month. The cost to fix a broken or cracked pipe typically falls between $150 and $370.
For step-by-step repair instructions, see our guide on broken sprinkler line repair.
Lateral Line (Zone Line)
Lateral lines are the pipes that branch off from the zone valves to feed individual sprinkler heads within a zone. Unlike the main line, lateral lines are only pressurized when their zone is actively running.
A lateral line break can be hard to spot because it only leaks during that zone’s run cycle. Whether it’s a small leak or a large break, it will eventually erode the soil and create a hole in the lawn or flower bed.
If you notice one area of your yard is consistently soggy but only after that zone runs, and the sprinkler heads in the area seem to have lost pressure, a lateral line break is likely.
Check Valve (Anti-Drain Check Valve / SAM)
A check valve prevents water from flowing backward through the sprinkler line when the system shuts off. It stops gravity from pulling water out of the lowest heads, which is exactly what causes low head drainage.
Many modern sprinkler heads come with built-in check valves (sometimes called SAM, for Seal-A-Matic). For heads without them, you can install aftermarket check valves or replace the heads entirely with models that include them.
The cascading problem: Practitioners on the LawnSite forum warn that installing a check valve on just the lowest head can push the drainage problem to the next-lowest head. One homeowner reported that every time they added a check valve to one head, the next one up the slope started leaking. They put check valves in all of them, and the lowest one started leaking again.
The lesson: all heads that sit lower in elevation than the pipe’s highest point need check valves. And critically, if the root cause is a weeping valve rather than simple gravity drainage, check valves alone won’t solve the problem. Fix the valve first, then address low head drainage.
Built-in vs. inline: One professional on an irrigation forum said they would never use inline check valves after spending 4 hours searching for a pipe restriction that turned out to be an inline check valve clogged with debris, nowhere near a sprinkler head. Built-in head check valves are generally preferred because they’re accessible and easy to service.
Pressure note: Check valves add friction loss. A Hunter low-drain check valve set for 12 feet of elevation creates about 7 PSI of friction loss. At 32 feet, the loss jumps to 15 PSI. On systems that already have marginal pressure, this can reduce sprinkler performance.
Backflow Preventer
The backflow preventer sits between your home’s potable water supply and the irrigation main line. Its job is to prevent contaminated water from flowing backward into your drinking water. It’s required by code in most municipalities.
A leaking or improperly installed backflow preventer can contribute to visible water leaks near the point of connection. The most common place for a pipe break is at the backflow preventer or at one of the sprinkler valve boxes.
If your backflow device is leaking, that’s a separate issue from sprinkler lines gushing water at the heads, but the symptoms can overlap. Water pooling near the backflow device while the system is off usually indicates a failed seal or cracked fitting at that unit rather than a valve or drainage problem downstream.
Water Pressure (PSI) and Pressure Regulators
Most irrigation valves perform best in the 40 to 50 PSI range. At higher pressures, particularly above 60 PSI, the force of the water can push past the diaphragm inside the valve, preventing it from closing completely.
This is a major factor in West Texas. Many municipalities in Northern Texas meter water at over 100 PSI, while most irrigation systems are designed to run at 50 PSI. This mismatch is a key reason valve leaks are so common in the region. If your sprinkler lines keep gushing water when turned off and you’ve already cleaned or replaced the valve internals, excessive water pressure may be the underlying cause.
The fix is installing a pressure regulator before the irrigation system to bring pressure down into the 40 to 50 PSI range. This protects valve diaphragms, reduces stress on fittings, and helps the entire system work as designed.
For more on pressure-related issues, check out our guide on fixing low water pressure in sprinkler systems (which also covers the opposite problem of too-high pressure).
Flow Control (Manual Flow Adjustment)
Sprinkler valves often include a manual flow control, a plastic screw on top of the valve that adjusts how much water passes through when the zone runs. This is not the same as the bleed screw or the solenoid.
If the flow control is fully open and the valve has a minor internal leak, more water will pass through than if the flow control were partially closed. Conversely, if someone closed the flow control all the way and the valve still leaks, the flow control is not the issue. It’s a secondary adjustment, not a fix for a bad valve.
Check whether the manual flow control is in the correct position. If you’re not sure what “correct” looks like, leave it alone and focus on the valve internals instead.
Valve Box
The buried box (usually with a green round cap or rectangular lid) that houses the zone valves and their wiring connections. When you need to inspect valves, tighten solenoids, or check bleed screws, the valve box is where you start.
Valve boxes fill with water, mud, and debris over time, especially in West Texas where blowing dirt is a year-round reality. A valve box full of sediment can push debris into valves when they cycle, contributing to the very leaks that cause sprinkler lines gushing water when turned off.
Keeping valve boxes clean and accessible is basic maintenance that prevents bigger problems.
How to Tell the Difference: Low Head Drainage vs. Valve Leak vs. Pipe Break
These three problems look similar from a distance (water where it shouldn’t be), but they behave differently.
Low head drainage produces water flow from the lowest head or heads on a zone after that zone finishes running. The flow tapers off and eventually stops, anywhere from a few minutes to a few hours. If you come back the next morning and everything is dry, this is almost certainly drainage.
A leaking valve produces constant water flow from the heads on one zone, 24 hours a day, 7 days a week. It doesn’t taper. It doesn’t stop. Look for moss, algae, or perpetually wet spots that never dry. A leaking valve can waste 50 to 300 gallons every day.
A main line break produces water flow whether any zone is running or not, whether the controller is on or off, and often in an area that doesn’t correspond to any sprinkler head. The volume can be significant. This is the emergency scenario.
The Water Meter Test
Here’s a simple diagnostic that most guides skip. Go to your water meter and confirm it’s spinning (indicating water flow somewhere on the property). Then locate the irrigation shut-off valve (usually a ball valve on the double check or backflow preventer) and close it. If the meter stops spinning, the leak is on the sprinkler system. If the meter keeps spinning, the leak is on the house side of the plumbing, not the irrigation.
This 60-second test saves hours of digging in the wrong place.
DIY Triage: What You Can Do Right Now
If you’ve found sprinkler lines gushing water when turned off, here’s what to do before calling anyone.
Step 1: Turn off the controller. Set it to the “off” or “rain” position so no zones can activate.
Step 2: Close the irrigation shut-off valve. This is usually a ball valve near the backflow preventer. Turning it to the perpendicular position shuts off all water to the irrigation system.
Step 3: Check the solenoid. Open the valve box and make sure the solenoid on each valve is turned clockwise until snug.
Step 4: Tighten the bleed screw. Find the bleed screw on the valve body and hand-tighten it.
Step 5: Clean the diaphragm (with caution). If you’re comfortable disassembling a valve, remove the bonnet screws, lift out the diaphragm, and wash it with clean water. A toothbrush works well for removing sediment. Inspect the diaphragm for tears, and check the valve seat for debris or damage.
When to stop and call a professional:
- If water won’t stop even with the shut-off valve closed (possible main line break upstream of the valve)
- If you clean the valve and it still leaks
- If multiple zones are leaking simultaneously
- If you’re uncomfortable working with pressurized water lines
If you need help deciding whether a repair is within DIY range, our guide on signs your sprinkler system needs repair covers common signals and realistic cost expectations.
What This Costs: Water Waste and Repair Estimates
Ignoring sprinkler lines gushing water when turned off gets expensive fast.
Water waste by the numbers:
- A leaking valve wastes 50 to 300 gallons per day
- A broken sprinkler head wastes roughly 2,400 gallons per month
- A dime-sized underground leak wastes 6,300 gallons per month
- According to the EPA, 30 to 60 percent of water running through sprinkler systems is often wasted due to poor scheduling, misalignment, and leaks
Repair costs:
- Minor DIY fixes (diaphragm replacement, O-rings): under $25
- Sprinkler valve replacement parts: $13 to $150
- Professional valve or fitting repair: $70 to $215
- Broken pipe repair: $150 to $370
- Average professional sprinkler system repair (all types): $130 to $410, with an average around $270
Waiting a month to fix a leaking valve can easily cost more in wasted water than the repair itself. For a detailed breakdown of repair pricing, see our valve repair cost guide.
Preventing the Problem
Seasonal Maintenance
Spring startup after winter is the peak time for sprinkler lines gushing water when turned off. Valves can trap air during reactivation, preventing the pressure differential they need to close properly. Debris loosened during freeze and thaw events gets pushed into valve seats. O-rings and diaphragms that sat dry all winter may crack or shrink.
Running a spring startup checklist catches these issues before they flood your yard or spike your water bill.
Pressure Regulation
If you’re in West Texas or any area where municipal water pressure exceeds 60 PSI, a pressure regulator upstream of the irrigation system is one of the best investments you can make. High pressure is the silent killer of irrigation valves. It forces water past diaphragms, wears out seals faster, and causes the exact type of valve weeping that leads to constant water flow when the system is off.
Check Valves on Slopes
For properties with elevation changes, installing check valves (or SAM heads) on all heads below the pipe’s highest point eliminates low head drainage. Just remember: fix any valve leaks first, then add check valves. Doing it in the wrong order masks the real problem.
Smart Flow Monitoring
Modern flow monitoring technology can detect leaks before you ever see water in your yard. These systems measure flow rates in real time and alert you when flow occurs outside of scheduled run times, which is exactly what happens when a valve leaks, a pipe breaks, or a head cracks. It’s the difference between catching a problem on day one versus discovering it on your water bill 30 days later.
Frequently Asked Questions
Why is water coming out of my sprinkler heads when the system is off?
The three most common causes are low head drainage (gravity pulling residual water to the lowest head), a leaking zone valve (debris or a torn diaphragm preventing the valve from sealing), or a main line break (constant-pressure pipe leaking regardless of system status). Low head drainage stops on its own. The other two require repair.
How can I tell if it’s low head drainage or a leaking valve?
Low head drainage stops after the pipes empty, usually within minutes to a few hours after the zone runs. A leaking valve produces constant flow, 24/7, that never stops. If you see moss, algae, or perpetually wet areas around the lowest sprinkler heads, that’s a strong sign of a valve leak rather than simple drainage.
Is water gushing from sprinkler lines when turned off an emergency?
It depends on the cause. Low head drainage is not urgent. A leaking valve wastes significant water and should be fixed soon, but it’s not a crisis. A main line break, where water flows continuously and won’t stop even when you turn off the controller, is an emergency. Shut off the irrigation supply valve immediately and call a professional.
Can I fix a leaking sprinkler valve myself?
Many homeowners fix leaking valves by cleaning the diaphragm and valve seat with a toothbrush and water. This resolves the majority of debris-related leaks. If the diaphragm is torn or the solenoid is faulty, replacement parts cost $13 to $25 and are available at most hardware stores. However, always shut off the water supply before disassembling a valve. Working on a pressurized valve is dangerous.
Why do sprinkler valves leak more often in Texas?
Many Texas municipalities deliver water at 80 to 100+ PSI, while most irrigation valves are designed for 40 to 50 PSI. This excess pressure forces water past the diaphragm and accelerates wear on internal seals. Installing a pressure regulator upstream of the system brings pressure into the correct range and significantly reduces valve failures.
Do check valves stop water from gushing out of sprinkler heads?
Check valves stop low head drainage by preventing gravity from pulling water backward through the pipe. They do not fix a leaking zone valve. If your valve isn’t sealing, water will still push through the check valve. Fix the valve first, then install check valves to address any remaining drainage.
How much water does a leaking sprinkler system waste?
A leaking valve can waste 50 to 300 gallons per day. A dime-sized underground pipe leak can waste 6,300 gallons per month. Even a single broken sprinkler head wastes approximately 2,400 gallons per month. The EPA estimates that 30 to 60 percent of residential irrigation water is wasted due to leaks, poor scheduling, and misalignment.
How much does it cost to fix sprinkler lines gushing water when turned off?
It varies by cause. A DIY diaphragm cleaning costs nothing. Replacement valve parts run $13 to $150. Professional valve repair averages $70 to $215. Broken pipe repair typically costs $150 to $370. The average professional sprinkler repair across all types is about $270. Delaying the fix almost always costs more in wasted water than the repair itself.
If you’re dealing with sprinkler lines gushing water when turned off and you’ve exhausted the DIY steps above, or if you’d rather skip the guesswork entirely, contact a local irrigation professional who can diagnose and resolve the issue quickly.