
TL;DR
Hydrawise controllers support wireless rain sensors through standard open/closed contact wiring to SEN terminals, configured via the Hydrawise app. The Hunter Wireless Rain-Clik (WR-CLIK) is the native choice, with an 800-foot range and sealed 10-year battery. While Hydrawise’s Predictive Watering adjusts schedules using forecast data, a physical rain sensor provides ground-truth detection at your actual property, catching localized storms that algorithms miss. Use both for the most reliable water management.
Why This Guide Exists
Hydrawise controllers are some of the smartest irrigation tools on the market. They pull weather forecasts, adjust runtimes automatically, and let you manage everything from your phone. So why would you also bolt a wireless rain sensor to your fascia board?
Because forecasts get it wrong. Especially in West Texas, where an isolated thunderstorm can dump an inch of rain on your block while your neighbor two miles away stays bone dry. Predictive Watering calculates adjustments once at the beginning of each day based on that morning’s forecast. If an unpredicted afternoon downpour rolls through, the system may still water your lawn that evening. A physical rain sensor catches what the algorithm cannot.
This glossary covers every term, wire, terminal, app setting, and troubleshooting step involved in wireless rain sensor pairing with Hydrawise controllers. Whether you’re a homeowner tackling this yourself or a property manager evaluating the technology, you’ll find everything consolidated in one place.
If you’re weighing the broader benefits of irrigation technology in this climate, that context helps frame why these details matter.
Core Component Terms
Hydrawise
Hydrawise is Hunter Industries’ cloud-based irrigation management platform. It connects compatible controllers to the internet, enabling remote scheduling, weather-based adjustments, flow monitoring, and sensor management through a smartphone app or web portal. According to Hunter, the platform can achieve up to 50% in water savings through its Predictive Watering adjustments.
Hydrawise Controller
Not every Hunter controller runs Hydrawise. The current Hydrawise-enabled models are:
- Pro-HC (6, 12, or 24 zones)
- HPC (4 to 32 zones)
- HCC (modular, uses the same body and modules as the ICC2 but with Hydrawise connectivity)
- X2 with WAND module (4, 6, 8, or 14 zones)
The X2 deserves a special note. On its own, it’s a standalone controller without Wi-Fi. Only when you add the WAND Wi-Fi module does it gain Hydrawise capabilities. This distinction confuses people who assume any X2 is “smart” out of the box.
The original HC Controller was discontinued in January 2023. If you have one, Hunter recommends replacing it with a Pro-HC, HPC, or X2 with WAND.
Wireless Rain Sensor (WR-CLIK)
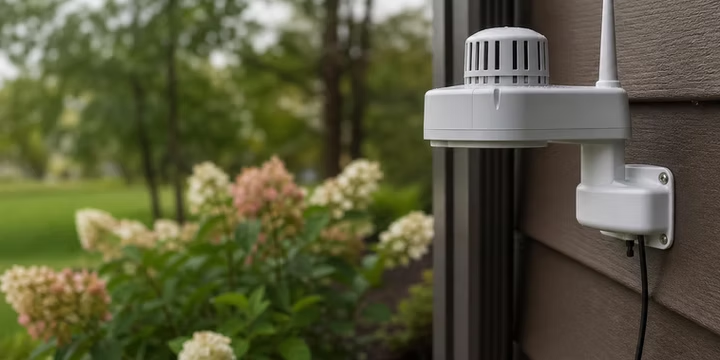
Hunter’s Wireless Rain-Clik is a two-part system: a transmitter that mounts outdoors where it’s exposed to rainfall, and a receiver that wires to the controller indoors. The wireless model offers an 800-foot communication range, a sealed battery designed to last 10+ years, and Quick Response Technology that shuts off irrigation within 2 to 5 minutes of detecting rain.
This is the native wireless rain sensor for Hydrawise controllers. Practitioners on Reddit’s r/Irrigation forum consistently recommend it as the simplest pairing option since both the sensor and controller come from Hunter.
Rain/Freeze-Clik (WRF-CLIK)
The WRF-CLIK adds freeze detection to the rain sensor. When temperatures drop to 37°F, it suspends irrigation to protect pipes and plants. This matters in Lubbock and surrounding areas where spring and fall temperature swings are common. One night it’s 65°F; the next morning it’s 33°F. A rain/freeze sensor handles both scenarios.
For more on protecting your landscape during cold snaps, see this guide on freeze protection in Lubbock.
Receiver
The receiver is the indoor component that wires directly to your Hydrawise controller. It picks up wireless signals from the outdoor transmitter and translates them into an open or closed circuit that the controller can read. The receiver has LED status lights: green means dry conditions, solid red means rain detected, and flashing red means it has lost communication with the transmitter (often indicating a dead battery).
Transmitter
The outdoor unit. It contains hygroscopic disks that swell when wet and shrink as they dry, plus a built-in radio that communicates with the receiver. The transmitter sends a synchronization signal to the receiver every hour. Its battery is sealed with epoxy to prevent corrosion, which means the battery is not replaceable. When the battery dies (typically after 10+ years), you replace the entire transmitter.
Wiring and Terminal Terms
This is where most of the confusion lives. Understanding the terminals on your Hydrawise controller is the single biggest factor in successful wireless rain sensor pairing with Hydrawise controllers.
SEN (Sensor) Terminal
The SEN terminal on a Hydrawise controller’s wiring panel is where sensor wires connect. Every Hydrawise-enabled controller has at least one sensor input. This is a low-voltage terminal that reads the open/closed state of whatever sensor is wired to it.
SEN COM (Sensor Common)
The shared ground terminal for sensors. When wiring a wireless Rain-Clik receiver, the white wire goes here. Think of SEN COM as the return path that completes the circuit.
SEN-1 and SEN-2 (Dual Sensor Inputs)
This is a detail that trips up a lot of people. HPC controllers manufactured before January 2023 had paired SEN-SEN terminals that shared a single input. Newer HPC controllers (date codes of January 2023 and later) split these into SEN-1 and SEN-2, each with its own independent input wired through the common SEN COM terminal.
Why this matters: with dual inputs, you can run a rain sensor on SEN-1 and a flow meter on SEN-2 simultaneously. Older single-input controllers force you to choose one or the other. Check the date code printed on your controller’s circuit board to know which version you have.
If flow monitoring interests you, here’s a deeper look at how flow monitoring detects hidden leaks.
24 VAC Terminals
The receiver needs power. The two yellow wires from the Rain-Clik receiver connect to the 24 VAC terminals on your controller. These are the same terminals that power your valve solenoids. Without this connection, the receiver can’t operate.
Normally Closed (NC)
This describes the default state of the sensor’s electrical contact. Hunter rain sensors are normally closed, meaning the circuit is complete when conditions are dry. When rain is detected, the contact opens, breaking the circuit and signaling the controller to suspend watering.
Normally Open (NO)
The opposite configuration. Some non-Hunter sensors default to an open circuit and close when triggered. This is less common for rain sensors but important to understand when configuring the Hydrawise app, because you must tell the software which type you’re using. Selecting the wrong one inverts the sensor’s behavior entirely.
Jumper Plate
A small metal bridge that comes installed across the SEN terminals on new controllers. It completes the circuit in the absence of a sensor. Before wiring any sensor, you must remove this jumper plate. If you leave it in place, the sensor will appear to do nothing because the circuit stays closed regardless.
The Orange Wire
The Rain-Clik receiver has an orange wire that causes persistent confusion. On Hunter and Hydrawise controllers, the orange wire is not used. It exists for normally open applications on non-Hunter controllers. Cap it off with a wire nut and forget about it. Community threads on Facebook and Reddit mention this wire repeatedly as a source of installation headaches, and the answer is always the same: leave it disconnected.
Software and Configuration Terms
Wiring is only half the job. The Hydrawise app needs to know a sensor exists and what it should do.
Sensor Input Assignment
After physically wiring the receiver, open the Hydrawise app and navigate to sensor settings. Click “Add Sensor To Controller,” give it a name, and assign it to the correct physical input (Sensor 1 or Sensor 2). This tells the software which terminal to monitor.
For a broader walkthrough of programming your Hunter system, that guide covers controller setup beyond just sensors.
Sensor Type (NC/NO)
A dropdown in the app where you specify whether your sensor is normally closed or normally open. Hunter sensors are typically closed. Getting this wrong is one of the most common mistakes, and it can make the system behave as if it’s raining when it’s not, or ignore rain entirely.
Zone Assignment
Not every zone should respond to a rain sensor. Drip zones under eaves, for example, never receive natural rainfall, so shutting them off during a storm wastes the opportunity to water plants that genuinely need it. In the Hydrawise app, you select exactly which zones the sensor controls. This granular control is one of the platform’s strongest features.
Sensor Bypass
Sometimes you need to temporarily disable the sensor. Maybe it’s malfunctioning, or maybe you’re testing something. In the app, scroll to the Controller Input section, change the input to “Unassigned,” and click OK. The sensor is now off until you reassign it. You can also bypass on a per-zone basis by deselecting specific zones from the sensor’s assignment list.
Custom Sensor Type
If you’re using a non-Hunter rain sensor (Rain Bird, Toro, or a generic model), you may need to configure it as a custom sensor. The Hydrawise app supports any open/closed contact sensor, but you’ll need to manually specify whether it’s normally closed or normally open and input any calibration data. One Facebook community thread at SERP rank 3 specifically asks about connecting a Rain Bird sensor to Hydrawise, and the answer is that it works, you just wire the receiver’s output to SEN terminals the same way and configure accordingly.
Weather Intelligence Terms
Predictive Watering
Hydrawise’s headline feature. It pulls forecast data from The Weather Company and adjusts watering schedules proactively. If rain is expected tomorrow, it may skip tonight’s cycle. If a heat wave is forecast, it may increase runtimes. The system calculates these adjustments once at the beginning of each day based on the forecast valid at that time.
Here’s the catch. If the weather then behaves differently than predicted (a short, intense downpour that wasn’t forecast, for example), irrigation may proceed even though the soil is already saturated.
Practitioners report real frustrations with this. One user on The Lawn Forum described being in the middle of a heat wave with local thunderstorms but no rain at their specific location for about a week. Yet irrigation was cancelled for two days because of high rainfall reported the day before at a nearby weather station. They concluded that the Hydrawise uses virtual weather station data in a mixed calculation, and there’s nothing you can do about it.
This is exactly why a physical wireless rain sensor paired with a Hydrawise controller is worth the investment. The sensor provides instant, on-site verification.
For related strategies on reducing your water bill, combining smart scheduling with physical sensors is the most effective approach.
Virtual Solar Sync
A software feature within Hydrawise that adjusts watering durations based on evapotranspiration (ET) data from local weather stations. It mimics what a physical Solar Sync sensor would do, but using internet-sourced data instead of on-site measurements.
Virtual Weather Station (VWS)
Hydrawise generates weather data for your location by interpolating readings from nearby official stations. The accuracy depends on how close those stations are and how uniform your local weather patterns are. In flat, uniform climates, VWS works well. In areas with microclimates or highly localized storms (like much of West Texas), the margin of error grows.
Solar Sync (Physical Sensor)
Hunter’s Solar Sync is a solar and temperature sensor designed for non-Hydrawise controllers like the Pro-C, X-Core, and ACC. It is not compatible with Hydrawise controllers. This is confirmed in multiple Reddit threads and by Hunter’s own product documentation. Hydrawise already handles ET adjustments through its Virtual Solar Sync, making the physical device redundant and incompatible.
Physical Rain Sensor vs. Predictive Watering: The Bottom Line
Use both. Predictive Watering is excellent as a baseline, adjusting schedules days in advance based on forecast trends. A physical rain sensor adds real-time override capability when the forecast is wrong. Consumer Reports data indicates that adding sensors or upgrading your system can save roughly 9,000 gallons of water per year. The EPA WaterSense specification reinforces this layered approach by requiring that smart controllers either include a rain sensor or be capable of interfacing with one.
In Lubbock, where isolated afternoon thunderstorms routinely defy regional forecasts, the combination is not just helpful. It’s the responsible approach.
Sensor Mechanics Terms
Hygroscopic Disk
The core detection mechanism inside most rain sensors. Hygroscopic disks are stacked inside the transmitter housing. When rain hits them, they absorb moisture and swell, pressing down on a mechanical switch that opens or closes the electrical contact. As they dry, they shrink back to their original size and release the switch. This is a purely mechanical process with no electronics involved in the detection itself.
Quick Response Technology
Hunter’s proprietary improvement to the traditional hygroscopic disk design. Standard rain sensors may need to accumulate a certain amount of rainfall before triggering. Quick Response takes approximately 2 to 5 minutes to shut off irrigation after rain begins. The reset time is also faster: roughly 4 hours in dry, sunny conditions, compared to up to 3 days for a fully saturated traditional disk stack.
Vent Ring
An adjustable collar on the Rain-Clik transmitter that controls airflow around the hygroscopic disks. Opening the vents increases airflow, which decreases the dry-out time (the sensor resets faster). Closing the vents restricts airflow, increasing the time it takes for the disks to dry and the sensor to re-enable watering.
In arid climates, you generally want the vents more open so the sensor resets quickly after brief rain events. In humid climates, closing them helps prevent the system from restarting too soon after a heavy rain.
Reset Time
How long the sensor takes to return to its dry/normal state after being triggered. For Hunter’s Quick Response sensors, expect about 4 hours in direct sun. If the disks are fully saturated from extended rain, reset can take up to 3 days depending on temperature and humidity.
Maintenance and Troubleshooting Terms
Transmitter Battery
The battery inside the Wireless Rain-Clik transmitter is sealed with epoxy and designed to operate for the life of the sensor, typically 10+ years. It is not replaceable. When the battery dies, you replace the entire transmitter unit (part number WRCLIK-TR).
One important compatibility note: if your wireless rain sensor transmitter has a short wire antenna (about 4 to 5 inches long), it uses an older radio frequency. In that case, you need to replace both the transmitter and the receiver with the current WR-CLIK system, because the old and new models operate on different frequencies.
Receiver LED Status Lights
- Green (steady): Dry conditions. Sensor is not triggered. Irrigation runs normally.
- Red (steady): Rain detected. Sensor is triggered. Assigned zones are suspended.
- Red (flashing): The receiver has lost communication with the transmitter. This typically means a dead or dying battery in the transmitter, or the transmitter is out of range.
Re-Pairing / Re-Addressing
When you install a new transmitter to replace an old one, the receiver needs to learn the new transmitter’s address. This is a simple pairing process (usually involving a button press sequence on the receiver), but it won’t happen automatically. If you swap transmitters and the system stops responding, re-pairing is almost certainly the issue.
Spindle Test
The quickest way to verify your wireless rain sensor pairing with Hydrawise controllers is working end-to-end. Start a zone manually through the Hydrawise app, then walk to the transmitter and press down the spindle on top until you hear a click. If the running zone stops within a few seconds, the entire chain (transmitter, receiver, wiring, app configuration, and solenoid response) is confirmed working.
Step-by-Step: Wiring a Wireless Rain-Clik to a Hydrawise Controller
For those who want the quick procedure rather than just definitions:
- Remove the jumper plate from the SEN terminals on your controller.
- Connect the two yellow wires from the receiver to the 24 VAC terminals.
- Connect the white wire to the SEN COM terminal.
- Connect the blue wire to SEN-1 (or SEN-2 if SEN-1 is already occupied by a flow meter).
- Cap off the orange wire with a wire nut. It is not used on Hunter controllers.
- Mount the transmitter outdoors in an area exposed to open sky, within 800 feet of the receiver.
- Open the Hydrawise app, go to sensor settings, and add a new sensor. Set the type to Normally Closed, assign it to the correct input (Sensor 1 or Sensor 2), and select the zones it should control.
- Run the spindle test to confirm everything is communicating.
If a zone seems to be skipping unexpectedly after installation, the sensor may be the cause. Before assuming a system fault, check troubleshooting steps for zones that skip.
Cross-Brand Sensor Compatibility
Hydrawise software supports any rain sensor or soil moisture sensor that uses a standard open/closed contact. This means Rain Bird wireless rain sensors, Toro sensors, and generic third-party options all work, provided you wire the receiver’s output correctly and configure the sensor type (NC or NO) in the app.
For non-Hunter sensors, you may need to use the Custom Sensor configuration path to input exact calibration parameters. The wiring principle is identical: one wire to SEN COM, one wire to SEN-1 or SEN-2, and power wires to 24 VAC if the receiver requires it.
Why West Texas Properties Benefit Most
Predictive Watering works best in regions with predictable weather patterns. West Texas is not one of those regions. Summer convective storms form quickly, move unpredictably, and drop rain in narrow bands. A weather station 5 miles from your house might record half an inch of rain while your property gets nothing, or vice versa.
A physical wireless rain sensor paired with your Hydrawise controller solves this mismatch. It responds to what’s actually happening at your property, right now. Paired with Predictive Watering’s forecast-based adjustments, you get the best of both worlds: proactive scheduling plus reactive override.
This combination is part of why sensor installation is included in professional maintenance plans. The sensor itself is inexpensive relative to the water it saves, especially across a full irrigation season in a semi-arid climate.
Regular sprinkler system maintenance should include annual sensor testing as part of spring startup procedures.
When to Call a Professional
Wireless rain sensor pairing with Hydrawise controllers is a manageable DIY project for someone comfortable with low-voltage wiring and app configuration. But there are situations where professional help makes sense:
- Your controller is an older HPC model and you’re unsure about the date code or terminal layout.
- You want to run both a rain sensor and flow meter but only have single SEN terminals.
- The sensor appears wired correctly but zones aren’t responding to rain events.
- You’re converting from a non-Hunter system and need to verify cross-brand compatibility.
- You want the sensor installed as part of a broader smart irrigation upgrade (weather-based programming, pressure regulation, efficient nozzles).
M&M Sprinklers has three licensed irrigators on staff who work with Hunter Hydrawise systems regularly. For professional installation, diagnostics, or a full smart irrigation system checkup, reach out at (806) 794-1300.
Frequently Asked Questions
Do I need a rain sensor if my Hydrawise controller already adjusts for weather?
You don’t strictly need one, but you should strongly consider it. Predictive Watering uses regional forecast data that can miss localized rain events. A physical sensor detects rain at your exact location and overrides the schedule in real time. Using both together is the most reliable setup, and it’s what the EPA WaterSense specification supports.
Can I use a Rain Bird wireless rain sensor with a Hydrawise controller?
Yes. Hydrawise supports any sensor with a standard open/closed contact. Wire the Rain Bird receiver’s output to SEN COM and SEN-1 just like you would a Hunter sensor. In the app, configure it as a Custom Sensor and set the contact type (normally closed or normally open) to match the Rain Bird’s specifications.
What is the orange wire on the Rain-Clik receiver for?
The orange wire provides a normally open contact for use on non-Hunter controllers. On any Hunter or Hydrawise controller, you do not use the orange wire. Cap it with a wire nut and leave it disconnected.
My HPC controller only has one SEN terminal pair. Can I still add a rain sensor?
If your HPC has a date code before January 2023, it has a single shared sensor input. You can connect a rain sensor to it, but you cannot simultaneously connect a flow meter. Controllers dated January 2023 and later have separate SEN-1 and SEN-2 inputs that support two sensors at once.
How do I know if the wireless rain sensor battery is dead?
The receiver’s LED will flash red when it loses communication with the transmitter, which typically indicates a dead battery. Since the battery is sealed and non-replaceable, you’ll need to purchase a new transmitter (part number WRCLIK-TR). If your current system uses the older wire-antenna model, you’ll need a new receiver too because the radio frequency changed between generations.
Is the Hunter Solar Sync compatible with Hydrawise?
No. The Solar Sync is designed for non-Hydrawise controllers like the Pro-C and X-Core. Hydrawise handles ET-based adjustments through its built-in Virtual Solar Sync feature, making the physical device both redundant and incompatible.
How long does the rain sensor take to reset after rain?
With Hunter’s Quick Response Technology, the sensor resets in about 4 hours under dry, sunny conditions. If the hygroscopic disks are fully saturated from extended rain, reset can take up to 3 days. You can adjust the vent ring on the transmitter to fine-tune the dry-out rate for your local climate.
Can I bypass the rain sensor without disconnecting any wires?
Yes. In the Hydrawise app, go to sensor settings, change the Controller Input to “Unassigned,” and save. The sensor is now bypassed until you reassign it. You can also selectively remove individual zones from the sensor’s assignment list, which is useful for drip zones under covered areas that should water regardless of rainfall.