
TL;DR
Most residential sprinkler lines are PVC, which is invisible to standard metal detectors, making them surprisingly hard to find. Start with free methods like checking system maps, flagging sprinkler heads, and tracing logical pipe paths. Escalate to electronic wire tracers or soil probing if needed. For complex systems or pre-construction projects, professional locating services with ground-penetrating radar cost around $250 per hour. Always call 811 before digging, but know that 811 does not mark private irrigation lines.
Knowing how to locate sprinkler lines is one of those skills you never think about until you absolutely need it. Maybe you’re installing a fence, planting a shade tree, or chasing down a leak that’s turning your water bill into a monthly horror show. Whatever the reason, hitting a buried irrigation pipe with a post-hole digger or trencher is a fast way to turn a weekend project into an expensive mess.
The core challenge is straightforward but important to understand upfront: the vast majority of residential sprinkler systems use PVC or polyethylene pipe. These materials are non-metallic. That means a basic metal detector will not find them. Every method described below works around this fundamental limitation in a different way.
This guide walks through every practical approach, ranked from free and easy to expensive and professional, so you can pick the right one for your situation.
If you’re already noticing signs your sprinklers need repair, locating the lines is often the first step toward fixing the problem.
Key Irrigation Terms You’ll Encounter
Before jumping into methods, a few definitions will save confusion:
- Mainline: The pressurized pipe running from your water source (and backflow preventer) to the zone valves. It holds pressure whenever the water supply is on, not just when a zone is running.
- Lateral line: The pipe running from a zone valve to the sprinkler heads it serves. It only pressurizes when that zone is active.
- Zone: A group of sprinkler heads controlled by a single valve. Most residential systems have 4 to 12 zones.
- Valve box: The in-ground plastic box (usually green or black) housing one or more zone valves. Often located near the house foundation or at property edges.
- Controller: The timer/computer (mounted in a garage or on an exterior wall) that tells each zone when to run and for how long.
- Tracer wire: A thin copper or coated wire buried alongside non-metallic pipe, specifically so it can be located later with electronic equipment. Newer systems typically include it. Older systems often don’t.
- Swing pipe / funny pipe: Flexible, small-diameter pipe connecting a lateral line to an individual sprinkler head. Usually 6 to 18 inches long.
- Riser: The vertical fitting that connects the underground pipe to the sprinkler head at ground level.
For a more complete list, see our sprinkler and irrigation glossary.
Method 1: Check for an Existing System Map
The fastest way to locate sprinkler lines is to find a document someone already made for you.
An as-built drawing (or system map) is the layout document created during installation. It shows pipe runs, valve locations, head positions, and sometimes pipe sizes and depths. If your system was professionally installed, the installer likely kept a copy on file. The previous homeowner may have received one at closing, or it might be tucked into a filing cabinet with other home documents.
Where to look:
- Contact the original installation company (their name is sometimes printed on the controller or valve boxes)
- Ask the previous homeowner or their real estate agent
- Check with your city’s permit office, as irrigation permits sometimes include a basic layout
Even a rough hand-drawn map saves hours of guesswork. If you can’t find one, the methods below will help you create your own.
Method 2: Visual Identification and Zone-by-Zone Mapping
This is free, requires no tools, and should always be your starting point when learning how to locate sprinkler lines without professional equipment.
Run each zone individually
Go to your controller and activate one zone at a time. Walk the yard while each zone runs and mark every active sprinkler head with a small flag, stake, or piece of colored tape. Use a different color for each zone if you have enough markers.
A useful trick from irrigation practitioners: the sprinkler head closest to the valve will pressurize slightly before the others in that zone. Watch for the first head to pop up when you start a zone. That tells you which direction the pipe runs from the valve.
Find all valve boxes
Valve boxes are typically located near the house foundation, along sidewalks, or at property edges. They’re usually flush with the ground and can be hidden by grass, mulch, or soil buildup. Probe gently with your foot or a screwdriver in likely areas.
Read the lawn for clues
Your grass is actually telling you where the pipes are, if you know what to look for:
- Green strips in dry weather: A line of greener, more vigorous grass often indicates a pipe running underneath (minor seepage keeps the soil moist along the pipe path)
- Dry spots: Areas the irrigation isn’t reaching may indicate a gap between zones or a line that doesn’t extend where you expected
- Minor depressions: A shallow dip in the lawn surface can signal a settling trench where pipe was buried
For a more detailed walkthrough of the head-finding process, our guide on how to find your sprinkler heads covers the step-by-step approach.
Method 3: Connect the Dots and Trace the Pipe Path
Once you’ve flagged all the heads and valve boxes, you can map the probable pipe route with surprising accuracy.
Contractors minimize material costs. That means non-metallic pipes almost always run in straight lines between the valve box and each sprinkler head. Grab a piece of string or a long tape measure, stretch it between flagged points, and mark the straight-line path with spray paint or additional flags.
Here’s the detail that makes electronic locating possible later: the low-voltage control wires running from the controller to each zone valve are almost always buried in the same trench as the mainline pipe. Hunter Industries confirms this, noting that “wires are normally buried in the same trench as the mainline, so wire tracing is also a good process to determine the location of the mainline throughout a site.” Those conductive wires give electronic locators something to detect even though the PVC pipe itself is invisible to them.
While you’re mapping, measure distances from fixed structures like your foundation, sidewalks, or fence corners. Write these measurements down. They create a permanent reference that survives lawn renovations and controller replacements.
Method 4: Soil Probing (Low-Tech, Use Carefully)
Soil probing is the most accessible hands-on method for confirming a suspected pipe location. You push a long, slender metal rod or heavy-duty screwdriver into the ground and feel for the distinct resistance of buried pipe.
How to probe correctly
Insert the probe gently and perpendicular to the expected line path. Work at regular intervals (every 6 to 12 inches) along your suspected route. Residential sprinkler lines are typically buried at 6 to 12 inches deep, though real-world depth varies wildly. Practitioners on forums report finding pipes as shallow as 4 inches and as deep as 14 inches on the same property. One contractor on the OKShooters forum put it bluntly: “It really varies a LOT depending on how long ago they were put in, who did it, and how much erosion has happened.”
In West Texas specifically, caliche layers and hardpan clay can make probing difficult. The probe may hit a rock-hard caliche layer and fool you into thinking you’ve found pipe, or it may require enough force that you can’t feel the difference between soil and PVC.
The critical warning
Probing should be a confirmation tool, not your primary locating method. A probe can puncture PVC pipe, nick controller wires, damage valve solenoids, or crack buried fittings. Use gentle pressure and stop immediately when you encounter resistance. The top-ranking irrigation guide on this topic puts it clearly: blind probing creates avoidable damage.
If you suspect you’ve already damaged a line, here’s how to diagnose and fix sprinkler problems before things get worse.
Method 5: The Wet Spot Technique (For Finding Leaks)
If you’re trying to locate sprinkler lines because you suspect a leak, this method pinpoints the break rather than the entire pipe run.
Run the zone in question for 10 to 15 minutes to pressurize the line. Water escaping from a crack or broken fitting will saturate the soil above the break, creating a noticeably damp or muddy area at the surface. Sometimes you’ll see a minor depression forming where the escaping water has eroded soil underground.
This technique won’t map your whole system, but it’s extremely useful for locating a specific problem spot. For a deeper look at leak-finding strategies, our guide on detecting underground sprinkler leaks covers additional approaches including meter-reading methods.
Some leaks don’t produce visible surface puddles at all. If you have high water bills but no obvious wet spots, that’s a different diagnostic challenge, and underground leaks with no visible puddles explains what to look for.
Method 6: Electronic Locating Tools
When free methods aren’t enough, electronic tools offer the most reliable way to locate sprinkler lines for most homeowners and professionals alike.
Wire tracers and valve locators
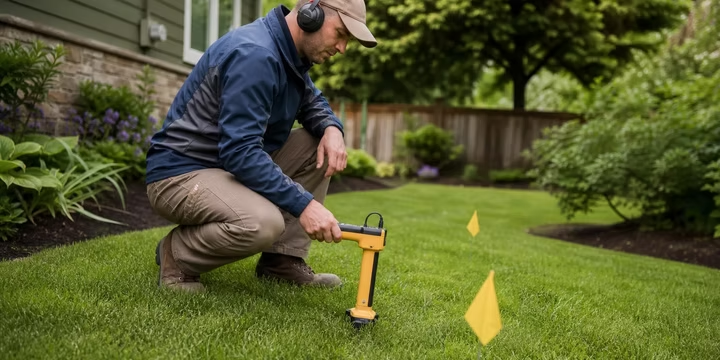
A wire tracer (sometimes called a “fox and hound” locator) sends an electromagnetic signal along a buried wire and detects it from above ground. Here’s the basic process:
- Disconnect the sprinkler controller from power
- Connect the transmitter to the valve wire you want to trace
- Walk the yard with the receiver, which emits an audible tone or visual signal that strengthens as you get closer to the buried wire
- Follow the strongest signal to map the wire path
Since control wires run in the same trench as the pipe, tracing the wire traces the pipe. This is the most practical electronic method for systems that have intact wiring from the controller to the valves.
Rental costs for electromagnetic locators run roughly $300 per week, which is reasonable for a one-time project.
When there’s no tracer wire
Older systems often lack tracer wire, and if the valve wiring is damaged or disconnected, a standard wire tracer won’t help. In these situations, you have a couple of options:
Locatable duct rod: Insert a fiberglass rod with an internal copper wire into an accessible end of the pipe (usually after removing a sprinkler head). Once the rod is inside, connect the transmitter to its copper wire. The rod becomes a temporary tracer line.
Armada Pro65 snake tracer: This specialized tool is small enough to navigate a 90-degree bend with a radius of just under 2 inches, meaning it can travel through the small-diameter PVC pipes used in most residential systems. You remove a sprinkler head, insert the Pro65, push it along the pipe path, and trace its signal from above.
DIY copper wire trick: Practitioners on irrigation forums share a simpler approach. If you can access one open end of a line, feed 18-gauge stranded copper wire into the pipe, then locate the wire with a standard metal detector. One forum user added: “I would also bury the new lines with the same wire outside and on top of the line for the same reason,” essentially creating your own tracer wire during future repairs.
Metal detectors alone
A standalone metal detector will only find metallic components: brass valves, metal fittings, or tracer wire. It cannot detect PVC or poly pipe directly. If someone tells you to “just use a metal detector” to find sprinkler lines, they’re skipping an important detail about how most residential systems are built.
Method 7: Professional-Level Methods
Some situations call for equipment and expertise beyond what DIY methods can provide.
Ground-penetrating radar (GPR)
GPR sends radar pulses into the ground and creates an image of subsurface features, including non-metallic pipes. It’s the only technology that can directly detect PVC without any wire or metallic component present.
The tradeoffs are significant. Professional GPR services typically charge around $250 per hour. The equipment itself costs between $14,000 and $100,000 to purchase, and monthly rental runs roughly $400. GPR effectiveness also drops in certain soil conditions. Very wet clay soils or areas with dense rebar can weaken the signal considerably, a relevant limitation in West Texas where clay soils are common.
For most residential situations, GPR is overkill. It makes sense for pre-construction projects where hitting any pipe means serious delays, for commercial properties with complex multi-zone systems, or for situations where every other method has failed.
Private utility locating services
This is different from calling 811 (more on that distinction below). Private locating companies use a combination of electromagnetic locators, GPR, and experience to map all underground utilities on a property, including irrigation lines.
If you’re planning a major project like a pool, patio, or home addition, the cost of a professional locate is minor compared to the cost of fixing a damaged irrigation system. Nationally, damages to buried utilities cost approximately $30 billion per year in repairs and societal impacts, and the Common Ground Alliance reports roughly 1,100 utility strikes daily across the U.S.
To understand what sprinkler repairs typically cost when things go wrong, our pricing guide breaks down common scenarios.
The 811 Rule: What It Does and Doesn’t Cover
This is the single most misunderstood aspect of locating underground lines, and every guide that glosses over it does readers a disservice.
Texas law requires you to contact 811 at least two business days before any excavation, even in your own backyard. This is non-negotiable.
But here’s what 811 actually does: it marks public utility lines only. That means gas, electric, telecom, and water mains. Sprinkler systems are private utilities. 811 will not locate them. You are responsible for finding your own irrigation lines, along with other private infrastructure like invisible pet fences, private lighting, and gas grill lines.
Several sources, including CenterPoint Energy and the Damage Prevention Council of Texas, explicitly state that private utilities require a separate private locate company or DIY methods. Calling 811 is a critical first step, but it’s the beginning of the process, not the end.
What About Divining Rods?
This keeps coming up. Forum posts, Facebook groups, and job-site conversations all include people who swear by dowsing rods for finding buried pipes and water lines. Practitioners on a Sawmill Creek woodworking forum and in Facebook irrigation groups mention it alongside legitimate electronic methods.
The scientific consensus is clear: no controlled study has confirmed that dowsing rods reliably locate underground water or pipes. Controlled trials show that dowsers do not outperform chance. The apparent success that some people experience is attributed to the ideomotor effect, where the dowser’s unconscious muscle movements cause the rods to react, not any signal from underground water.
This doesn’t mean the people recommending them are dishonest. The ideomotor effect is subtle and convincing. But when you need to know exactly where a pipe is before driving a fence post through it, proven electronic methods are the right choice.
Common Scenarios That Require Locating Sprinkler Lines
Understanding when you need to locate sprinkler lines helps you pick the right method for the job.
Before installing a fence: Fence posts go 18 to 36 inches deep, well past typical sprinkler line depth. Even a single punctured lateral line means digging up the post, repairing the pipe, and resetting. Locate every line along the planned fence route before the first hole.
Before planting trees: Large-root species will eventually grow into and crush irrigation pipes. Knowing where the lines run helps you choose planting locations that avoid conflicts. For properties where irrigation and tree health need to work together, our guide on coordinating irrigation and tree care explains how to plan both systems around each other.
Before adding a patio, deck, or pool: These projects often require rerouting lines rather than just avoiding them. Knowing the full pipe layout before construction starts prevents costly surprises. If a reroute turns out to be necessary, our sprinkler reroute cost guide breaks down what’s involved.
Before adding zones or drip irrigation: Tapping into an existing line requires knowing where it runs and what size pipe you’re working with. Our guide on adding drip irrigation to existing systems covers the planning process.
When troubleshooting a zone that won’t work: A dead zone could mean a wiring break, a failed valve, or a crushed pipe. Locating the line narrows down the possibilities.
When chasing a suspected leak: High water bills with no visible cause often point to an underground line break. Locating the line is step one in finding the damage.
Tips to Make Future Locating Easier
Every time you or a professional opens a trench or makes a repair, you have an opportunity to make the next locate simpler:
- Request a system map. Ask your installer or repair technician for a written or drawn layout of what they installed or repaired, with measurements from fixed reference points.
- Add tracer wire. Whenever a new line is installed or an old one is repaired, run 18-gauge tracer wire alongside the pipe before backfilling. This single step makes future electronic locating fast and reliable.
- Photograph before backfilling. Take photos of open trenches with a tape measure visible for scale. Include a reference point (house corner, sidewalk edge) in the frame.
- Mark valve box locations on your property survey. A simple X on a survey copy, stored with your home documents, survives decades of lawn changes and ownership transfers.
- Label your controller. Write the zone number and a brief description (e.g., “Zone 3, front yard left, valve box near driveway”) on a piece of tape on the controller door.
Equipment Cost Comparison
When to Stop DIY and Call a Professional
There’s no shame in calling for help. Consider professional locating when:
- You’ve inherited a system with no documentation and can’t find the valve boxes
- The property has been significantly regraded or landscaped since the system was installed
- You’re planning construction that requires precise pipe location (not just “somewhere around here”)
- Multiple previous locating attempts have failed
- The system has metal and PVC sections mixed together, making electronic results confusing
- You’re in an area with dense underground utilities (gas, electric, telecom) and need to distinguish irrigation from everything else
A professional with experience in your local soil conditions will save time and prevent damage. In the Lubbock and West Texas area, where caliche and hardpan clay create unique challenges for both probing and GPR, local knowledge matters.
Frequently Asked Questions
How deep are sprinkler lines buried?
Residential sprinkler lines are typically buried 6 to 12 inches deep, with 10 to 12 inches being most common. Commercial installations may be 12 to 18 inches deep. Real-world depth varies significantly based on the installer, age of the system, and soil erosion over time. Forum contractors report finding pipes anywhere from 4 to 18 inches deep on the same property.
Can I use a metal detector to find sprinkler lines?
Only if your system has metallic components along the pipe route, such as tracer wire, brass valves, or metal fittings. Most residential sprinkler pipe is PVC or polyethylene, which a metal detector cannot detect. You would need to insert a copper wire or locatable rod into the pipe first, then trace that with the detector.
Will 811 locate my sprinkler lines?
No. 811 marks public utility lines (gas, electric, telecom, water mains). Sprinkler systems are private utilities, and you are responsible for locating them yourself. You should still call 811 before any digging project because public utilities may cross your yard, but don’t expect them to mark irrigation pipes.
How do I find sprinkler lines if there’s no tracer wire?
You have several options. Start with visual methods (flagging heads, tracing logical paths). For electronic locating, you can insert a locatable duct rod or fiberglass rod with an internal copper wire into the pipe from an open access point, then trace the signal with an EM locator. The Armada Pro65 snake tracer is designed specifically for this situation in small-diameter irrigation pipes.
How much does it cost to have someone professionally locate sprinkler lines?
Private utility locating services typically charge $100 to $400 per visit. Ground-penetrating radar services run about $250 per hour. For most residential properties, a single visit of one to two hours is sufficient. Compare that to the cost of repairing a crushed pipe or a shorted wire, and professional locating is usually the cheaper option.
What’s the best method to locate sprinkler lines before installing a fence?
Use a combination approach. Start by running each zone and flagging all heads along the planned fence line. Trace the logical pipe path between heads. If the fence route crosses any suspected lines, confirm the exact location with a wire tracer or careful probing. For fence projects along property edges where mainlines often run, consider a professional locate, as mainline breaks are more expensive and disruptive than lateral line repairs.
Do divining rods work for finding sprinkler lines?
No scientific evidence supports the reliability of divining rods for locating buried pipes or water. Controlled studies consistently show that dowsing does not outperform random chance. The apparent success some people report is attributed to the ideomotor effect, where unconscious muscle movements cause the rods to react. Electronic wire tracers and locatable rods are proven, reliable alternatives.
Can I locate sprinkler lines without digging at all?
Yes, for mapping purposes. Visual identification, wire tracing, and GPR can all locate lines without breaking ground. The only method that requires actual digging is soil probing, and even that only involves pushing a thin rod a few inches into the soil. You may eventually need to dig to make a repair, but the locating process itself can be completely non-invasive.