
TL;DR
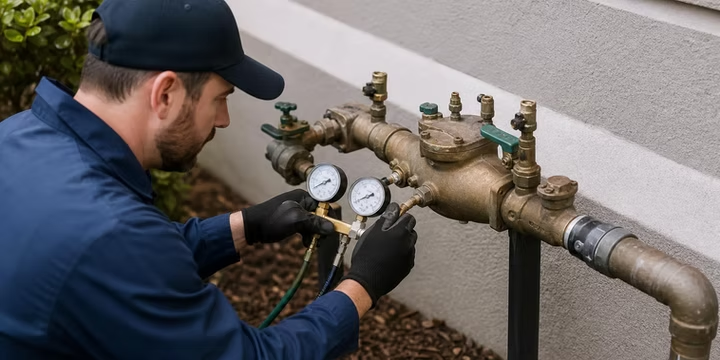
Backflow preventer repairs are diagnosed and fixed through a structured process: the technician identifies the device type, matches visible symptoms to likely failure points, tests the assembly with calibrated gauges, inspects internal components for debris or worn parts, then cleans, rebuilds, or replaces what failed. The repair is not complete until the assembly passes a retest. In Texas, official backflow testing and repair requires a TCEQ-licensed Backflow Prevention Assembly Tester (BPAT), and in Lubbock, a failed assembly must be repaired or replaced, retested, and reported to the city.
If your backflow device is leaking or you received a city notice, learn the signs your device needs repair.
What Backflow Preventer Repair Diagnosis Actually Means
Understanding how backflow preventer repairs are diagnosed and fixed starts with a basic question: what is the device protecting against?
A backflow preventer is a mechanical assembly installed between your potable water supply and a possible contamination source, most commonly an irrigation system. Backflow happens when water reverses direction, either because of a pressure drop in the supply (backsiphonage) or because downstream pressure exceeds supply pressure (backpressure). That reversal can pull fertilizer, pesticides, soil bacteria, or stagnant irrigation water back into your drinking-water plumbing.
The City of Lubbock defines backflow as the undesirable reverse flow of water that can contaminate drinking water during events like a main break or firefighting. Irrigation systems connected to the city water supply require a backflow prevention assembly and testing every one to three years.
This is not just sprinkler hardware. The EPA documented 459 backflow incidents between 1970 and 2001, with an estimated 12,093 illness cases, while noting that reported incidents likely represent only a fraction of the total. These devices protect public health, which is why their testing, repair, and certification are regulated.
Why Backflow Preventers Fail
Before exploring how these repairs are diagnosed, it helps to understand the common causes of failure. Backflow assemblies are mechanical devices under constant water pressure, and their internal parts wear out or get fouled over time.
The most frequent causes include:
- Dirt and debris on check valve seats. FEBCO’s maintenance documentation identifies debris in seating areas as the most common cause of check fouling. Sand, rust flakes, mineral scale, small stones, and even spider webs can prevent a tight seal.
- Worn rubber parts. Discs, O-rings, diaphragms, and poppets degrade with age and lose their ability to seal.
- Weak or corroded springs. Springs hold check valves closed against reverse flow, and corrosion or fatigue can weaken them.
- Mineral buildup. West Texas hard water accelerates scale deposits on seats, pistons, and O-rings.
- Freeze damage. Water trapped in the assembly body, shutoff valves, or plastic internals can freeze and crack brass castings. This is a recurring issue in Lubbock and West Texas after cold snaps.
- Water hammer or pressure surges. Sudden pressure spikes can unseat checks or damage relief valves.
- Leaky shutoff valves. A shutoff that does not fully close can skew test results and mimic internal failure.
Practitioners on Reddit consistently point to debris as the first suspect when an RPZ relief valve starts leaking, noting that a fouled first check is often the real culprit rather than the relief valve itself. Zurn/Wilkins documentation backs this up, stating that most problems occur in the #1 check because debris enters the preventer from the inlet side first.
If you need to winterize your backflow preventer before freeze season, addressing that step prevents many of these failures from happening in the first place.
What the Technician Checks First
A licensed tester diagnosing a backflow preventer problem does not start by disassembling parts. The process begins with identification and observation.
Device identification
The tech notes the assembly type (PVB, DCVA, RPZ), brand, model, size, serial number, and direction of flow. This matters because different assemblies fail differently, and the symptoms mean different things depending on which device you have.
Visual inspection
Before connecting any gauges, the technician looks for:
- Where the leak originates (relief port, top canopy, test cock, body, unions, shutoff valves)
- Whether the brass body shows cracks, corrosion, or green mineral staining
- Whether test cocks and shutoff valves operate freely
- Whether the installation height, orientation, and clearance are correct
- Whether the device appears to be the approved type for its application
The City of Lubbock notes that residential assemblies are often in a plastic box in the ground near where water enters the property, while commercial assemblies may be above ground in insulated enclosures.
Matching the symptom to the device family
The visible symptom tells the technician where to start, not what to replace. Here is how symptoms map to likely problems:
This table is one of the most practical tools for understanding how backflow preventer repairs are diagnosed. A relief-port drip on an RPZ and a top spray on a PVB are completely different problems with different internal causes, even though both look like “a leak.”
How RPZ Relief-Valve Leaks Are Diagnosed and Fixed
A reduced pressure assembly (RPZ or RPBA) is the easiest type for homeowners to notice when something goes wrong, because the relief valve can drip, spit, or dump water visibly. But a relief-port leak does not automatically mean the relief valve itself is bad.
The diagnostic sequence
FEBCO’s troubleshooting guide for RP assemblies outlines a practical isolation method that experienced testers follow:
- Observe whether discharge is constant or intermittent. Constant discharge points toward a fouled component. Intermittent discharge may indicate pressure fluctuations, water hammer, or a partially fouled check that occasionally unseats.
- Close the downstream shutoff valve (#2 gate). If the relief discharge stops, the problem likely involves the #2 check or backpressure from the downstream system.
- If discharge continues, open test cock #4. This creates flow past the first check. If the discharge stops, the first check is the likely culprit.
- If discharge still continues, inspect the relief valve. The relief valve seat, diaphragm, piston O-ring, or spring may need cleaning or replacement.
This is exactly the kind of structured diagnosis that separates backflow preventer repairs from guesswork. The Watts troubleshooting guide for reduced pressure assemblies maps continual vent dripping to six possible causes: fouled first check, damaged relief seat, mineral buildup on the relief valve piston O-ring, excessive backpressure, freezing, or water hammer.
One practitioner in an r/Irrigation thread about a Febco 825Y relief leak explained that “relief leaks are generally because debris is in the first check,” and recommended inspecting rubber gaskets, the plunger, and the seat for rust and debris before considering replacement.
Common RPZ fixes
- Flush the assembly to clear loose debris
- Clean the #1 check seat and disc
- Clean the relief valve seat
- Replace worn rubber parts (disc, O-ring, diaphragm)
- Replace the check module if the seat surface is damaged
- Address downstream backpressure or water hammer causing repeated relief discharge
- Replace the assembly if the body is cracked, badly corroded, or an obsolete model
For a deeper look at what causes backflow devices to leak and what fixes apply, see our guide on backflow device leak causes.
How PVB Repairs Are Diagnosed
A pressure vacuum breaker (PVB) is common on residential irrigation systems in Lubbock. It sits above ground, typically near the point of connection, and protects against backsiphonage. The most recognizable failure symptom is water spraying from under the top canopy or bell.
In a YouTube walkthrough with over 100,000 views, Ewing Outdoor Supply demonstrated a Febco 765 PVB repair and noted that water flushing from under the canopy is the obvious sign of a PVB problem, with common causes being age, debris, or improper winterization. The video also warned that some water districts require certified technicians before any repair.
What the technician evaluates
- Is the device installed at the required height and orientation?
- Is water coming from under the canopy or from the air inlet specifically?
- Is the bonnet or poppet cracked, stuck, or worn?
- Is debris preventing the air inlet disc or check from seating?
- Did the device freeze? (Cracked body means replacement, not repair.)
Practitioners on Reddit report finding everything from hardened rubber and sediment buildup to spider webs preventing the air inlet from sealing properly. One commenter in an r/Irrigation thread recommended opening and cleaning the unit first, then buying a repair kit if cleaning does not work, and replacing the whole assembly only if the housing is cracked.
Common PVB fixes
- Clean debris from the air inlet and check area
- Replace the bonnet/poppet kit
- Replace check assembly components (disc, spring, seat)
- Replace the entire PVB if the bronze body is cracked or if the model is no longer approved
For PVB-specific leaks involving the vacuum breaker portion, our vacuum breaker leak guide covers additional detail.
How DCVA Failures Are Diagnosed
A double check valve assembly (DCVA) has two check valves in series but no relief port. This means it can fail internally without any visible leak. The failure only shows up during a gauge test, or possibly as reduced downstream flow.
FEBCO’s DCVA manual identifies these common causes when a check fails to hold the required 1.0 PSID minimum:
- Debris on sealing surfaces
- Leaking shutoff valve affecting test accuracy
- Damaged seat or seat disc
- Spring or stem not moving freely
Common DCVA fixes
- Clean check seats and rinse parts with clean water
- Replace worn rubber discs
- Replace the check module
- Repair or replace a leaking shutoff valve that skews test results
- Flush pipe debris upstream of the assembly
- Retest after any repair
Because DCVAs can fail silently, regular testing is the only reliable way to catch problems. This is one reason Lubbock requires periodic backflow testing even if the device looks fine.
How Repairs Are Fixed: Clean, Rebuild, or Replace
Once the diagnosis points to the failing component, the technician chooses the smallest reliable fix. This decision follows a practical three-tier framework.
Tier 1: Clean
Cleaning is the right fix when debris, grit, rust flakes, sand, mineral crust, or insect debris is preventing a seal, but the rubber is still pliable and the body is intact. FEBCO’s service procedures instruct flushing and rinsing all parts with clean water before reassembly, with careful inspection of seals and seating surfaces for damage.
Tier 2: Rebuild
Rebuilding means replacing the worn internal parts while keeping the existing assembly body. This applies when rubber discs are hardened, cut, or deformed, when O-rings leak, when springs are weak or corroded, or when PVB bonnet/poppet components are worn. Manufacturers like Watts produce repair kits designed to replace the major internal components (seat, seat O-ring, disc assembly, spring, check cage, and cover O-ring) for specific models.
Tier 3: Replace
Replacement is the right call when:
- The brass body is cracked
- The casting or shutoff valves split from freeze damage
- Severe corrosion or electrolysis has damaged seating surfaces beyond repair
- The device is the wrong type for the hazard level
- Replacement parts are unavailable or discontinued
- Multiple failures make continued repair uneconomical
- Lubbock’s ordinance requires installing an approved backflow prevention assembly (the code specifically limits AVBs for existing irrigation system repairs)
Many failures are repairable when the body is sound and parts are available. Cracked brass, freeze-split bodies, wrong device type, repeated failures, or severe corrosion usually move the job from repair to replacement.
In Reddit’s r/Irrigation, practitioners regularly distinguish between a cracked ball valve (potentially replaceable as a separate component) and a cracked assembly body (which always means full replacement). One commenter noted that water trapped in a ball valve can freeze and split the brass even if the body itself survives.
What Happens After the Repair in Lubbock
A backflow preventer repair is not finished when the leak stops. In Texas, the repair is not complete until the assembly passes a retest. TCEQ guidance states that if a BPAT determines during a routine test that an assembly needs repair and will fail, it must be repaired and retested before it can be considered passed.
The compliance loop
- Retest. The technician runs the same calibrated gauge test to verify the repaired assembly meets performance standards.
- Submit documentation. Lubbock’s ordinance requires test reports to be submitted to the city water purveyor office within 10 days of testing after installation, replacement, or repair.
- Property owner responsibility. The City of Lubbock says all costs associated with installation, maintenance, and testing are the customer’s responsibility.
- Consequences for noncompliance. Water service could be shut off until the assembly has been tested and submitted, and the property owner could be fined up to $2,000 per day.
To make the retest go smoothly, review our checklist to prepare for a backflow inspection.
Lubbock tester requirements
Not just any plumber can certify a backflow test in Lubbock. The city requires a TCEQ-licensed BPAT to register annually with the city, provide proof of licensure, carry proper tools and equipment, register gauge serial numbers, and maintain test-kit calibration to a two-percent accuracy factor.
Who Can Legally Repair Backflow Preventers in Texas
This is a point that trips up many homeowners. TCEQ states clearly that a person who repairs or tests the installation or operation of backflow prevention assemblies must hold a TCEQ-issued BPAT license. BPATs are qualified to test and repair assemblies on domestic, commercial, industrial, and irrigation service.
Texas Administrative Code §344.52 adds that if an irrigation system connected to a potable water supply requires major maintenance, alteration, repair, or service, the backflow prevention assembly must be tested before being placed back in service, with results provided to the local water purveyor within 10 business days.
Homeowners can observe symptoms and prepare the site for the technician. They should not attempt to officially test, repair, or certify their own backflow assembly.
Practitioners on Reddit reinforce this point. In a Texas-focused r/Irrigation thread, a self-identified Texas BPAT explained that ball valves are considered part of the assembly and that repairs should be made by a backflow technician, then tested by a TCEQ-licensed BPAT registered with the local water purveyor.
Can a Backflow Preventer Cause Low Sprinkler Pressure?
Yes. A fouled strainer, partially closed shutoff, mineral-scaled check, or debris-restricted seat inside the backflow assembly can significantly reduce downstream flow. When sprinkler zones run weak after the backflow device, the problem may not be the heads, nozzles, or zone valves at all.
Watts lists fouled strainers and undersized valves among the causes of high pressure drop across a backflow assembly. If your zones went weak around the same time you noticed a backflow issue (or after a repair), have the device checked before chasing problems downstream.
For a broader look at what else could be causing weak zones, our guide on sprinkler low pressure causes walks through the full diagnostic chain.
What Homeowners Can Do Before Calling
You cannot certify your own backflow assembly in Texas, but you can make the technician’s job faster and more effective with a few simple steps.
Safe prep checklist:
- Locate the device. Residential assemblies in Lubbock are often in a plastic box in the ground near the water meter. Commercial devices may be above ground in an insulated enclosure.
- Clear access. Remove dirt, mulch, or landscaping covering the valve box. Make sure the lid can be removed.
- Take photos. Photograph the leak location, the device tag (brand, model, serial number), and any visible cracks or corrosion.
- Note when the leak happens. Does it leak constantly or only when the sprinkler runs? This detail helps the technician narrow the problem faster.
- Do not bury test cocks or modify the assembly. Any changes before the tester arrives can complicate diagnosis.
- Keep your city notice handy. If you received a letter from the City of Lubbock, bring it to the appointment.
- If water is actively flooding, shut off the irrigation branch valve if you know which one it is. Otherwise, call for help.
Reddit threads from Lubbock show that many homeowners receive city backflow notices and are unsure whether they even have a backflow assembly, what the letter means, or who to call. One commenter warned about paying to inspect a nonexistent system after receiving what they called a “scary city notice.” Confirming that you actually have an irrigation backflow assembly is step one.
When to Call a Licensed Backflow Tester Immediately
Some situations require prompt action:
- You received a failed test report or a City of Lubbock compliance notice
- The RPZ relief valve is dumping water continuously
- Water is spraying from the top of a PVB
- You see a crack in the brass body or shutoff valve
- You suspect freeze damage after a cold snap
- Sprinkler pressure dropped significantly after the backflow assembly
- You notice discolored or off-tasting water from indoor faucets
- Your property has a commercial or health-hazard cross-connection
- Any repair that needs official certification before the system goes back in service
A backflow industry professional on LinkedIn (Gary “The Backflow Nerd” McLaren, via HydroCorp) made a useful distinction: many people think only testable assemblies matter, but non-testable backflow devices also need maintenance. For irrigation compliance, the focus is on testable assemblies with documented test forms. But hose bib vacuum breakers and similar devices are still part of cross-connection control even if they are not tested the same way.
Preventing the Next Failure
Understanding how backflow preventer repairs are diagnosed and fixed is useful when something goes wrong. Preventing repeat failures is even better.
Routine maintenance extends the life of internal parts and catches small problems before they become emergency repairs or failed tests. Our backflow preventer maintenance guide covers seasonal care, device-specific upkeep, and Lubbock compliance schedules.
Key prevention steps include proper winterization before freeze season, keeping the valve box clear and accessible, avoiding modifications that restrict flow or change pressure conditions, and staying current on your city testing cycle.
FAQ
Can I repair my own backflow preventer in Texas?
Homeowners can visually inspect the device and clear access for the technician, but TCEQ requires anyone who repairs or tests the installation or operation of backflow prevention assemblies to hold a TCEQ-issued license. Official repair, testing, and certification should be handled by a licensed BPAT.
Why is my RPZ relief valve leaking?
Common causes include a fouled first check valve, debris on the relief valve seat, a fouled second check combined with backpressure, inlet pressure fluctuations, water hammer, or worn rubber parts. The relief-port leak is a symptom that can point to several different internal components, not just the relief valve itself.
Why is water coming from the top of my pressure vacuum breaker?
This usually points to a worn or damaged bonnet/poppet, a stuck air inlet disc, debris preventing proper sealing, or freeze damage. Age and improper winterization are among the most common causes.
Does a leaking backflow preventer always need full replacement?
No. When debris or worn rubber is the root cause and the body is sound, cleaning or rebuilding with a manufacturer repair kit is often enough. Replacement becomes necessary when the brass body is cracked, the device is severely corroded, the assembly type is wrong for the application, parts are discontinued, or the unit has failed repeatedly.
What happens if my Lubbock backflow assembly fails a test?
The City of Lubbock requires the property owner to have the assembly repaired or replaced and retested by a certified tester. Test reports must be submitted to the city within the required timeframe. Noncompliance can result in water service shutoff and fines up to $2,000 per day.
How often does Lubbock require backflow testing?
Irrigation systems connected to the city water supply require testing every one to three years, depending on the assembly type and hazard classification. Where the potential backflow is classified as a health hazard, certified inspections are required annually or more frequently.
Can a backflow preventer cause low sprinkler pressure?
Yes. A fouled strainer, mineral-scaled check, partially closed shutoff, or debris-restricted seat inside the assembly can reduce downstream flow enough to make sprinkler zones run weak. If pressure problems started around the same time as a backflow issue, the device should be inspected before replacing heads or valves.
Is the repair done once the parts are replaced?
No. TCEQ guidance states that the assembly must be repaired and retested before it can be considered passed. In Lubbock, the test report must also be submitted to the city. A backflow preventer repair is diagnosed and fixed through a complete cycle: symptom identification, testing, component repair, retesting, and documentation.