
TL;DR
When an irrigation zone won’t turn on or won’t shut off, the problem is almost always in the valve, the solenoid, or the wiring connecting them. The fastest way to diagnose valve and solenoid problems in irrigation systems is to start with the manual bleed test, which tells you immediately whether the fault is mechanical or electrical. A basic multimeter (under $30) and a systematic approach can save you hundreds of dollars in unnecessary part replacements.
A zone goes dead. Or worse, it won’t stop running at 2 a.m. and you wake up to a flooded sidewalk. Either way, you need answers, and the terminology around valves, solenoids, diaphragms, and pilot ports can make the whole thing feel more complicated than it actually is.
This guide walks through every term and concept you’ll encounter when diagnosing valve and solenoid problems in irrigation systems, organized not alphabetically but in the order you’ll actually need them during troubleshooting. Think of it as a diagnostic glossary: each definition connects directly to a real troubleshooting step.
If you’re noticing multiple symptoms across your system, start with a full system inspection to narrow down the problem area before focusing on individual valves.
Know Your Parts: Component Terms That Matter for Diagnosis
Before you can troubleshoot anything, you need to know what you’re looking at. These are the components involved in nearly every valve and solenoid diagnosis.
Zone Valve (Irrigation Valve)
A zone valve is the individual valve that controls water flow to a specific group of sprinkler heads or drip emitters. A typical residential irrigation system has several zone valves, and the controller activates them one at a time. Each valve sits underground in a valve box, usually near the area it irrigates.
Why it matters for diagnosis: When only one zone fails, the zone valve for that area is your primary suspect. When every zone fails, the problem is probably upstream (controller, common wire, or master valve).
Solenoid
The solenoid is the cylindrical electrical component screwed into the top of the valve. When the controller sends 24V AC power to the solenoid, a coil inside creates a magnetic field that lifts a small plunger. This opens a pilot passage that changes the pressure above the diaphragm, allowing the valve to open. When power stops, a spring pushes the plunger back down and the valve closes.
Why it matters for diagnosis: The solenoid is the bridge between your electrical system and your mechanical valve. It’s also the most commonly replaced component. For a deeper explanation of how this component works, see our solenoid guide.
Diaphragm
The diaphragm is a flexible rubber membrane inside the valve body that physically opens and closes the water path. Water pressure holds it sealed against the valve seat when the valve is off. When the solenoid opens, it relieves pressure above the diaphragm, and incoming water pressure pushes it open from below.
Why it matters for diagnosis: A torn, wrinkled, or stiff diaphragm is one of the top causes of valves that won’t close completely. If your diaphragm has visible cracks, perforations, or mineral deposits, the valve will leak or fail to seal.
Plunger (Armature)
The plunger is the small metal piston with a rubber base inside the solenoid housing. It must move freely up and down for the solenoid to function. Debris, corrosion, or a worn rubber tip can prevent full travel.
Why it matters for diagnosis: A stuck plunger mimics a dead solenoid. Before replacing the entire solenoid, remove it and check whether the plunger moves freely when you shake it. If it rattles loosely, it’s likely fine. If it’s frozen in place, that’s your problem.
Pilot Port and Exhaust Port
These are tiny internal passages that control pressure above the diaphragm. The pilot port allows water into the chamber above the diaphragm, while the exhaust port allows water to escape when the solenoid opens. The inlet of the pilot flow path is deliberately small, and the exhaust is larger, creating the pressure differential that makes the valve work.
Why it matters for diagnosis: Because these ports are so small (sometimes under 1/16“), they are extremely prone to clogging from debris and mineral deposits. Irrigation training materials consistently identify debris in these passages as the single most common cause of all valve failures, ahead of electrical faults.
Manual Bleed Screw
A mechanism (usually a small screw or knob on top of the valve) that lets you open the valve manually without any power from the controller. Turning the bleed screw relieves pressure above the diaphragm, either venting to the atmosphere or redirecting flow downstream.
Why it matters for diagnosis: This is the most important diagnostic tool built into your valve. It is the foundation of the entire troubleshooting process, as explained in the diagnostic section below.
Common Wire (C Wire / COM)
The common wire is the shared return path that connects every solenoid in your system back to the controller’s COM terminal. Each zone has its own dedicated “hot” wire, but they all share this single return wire.
Why it matters for diagnosis: A broken common wire kills every zone on the system simultaneously. This is a frequently overlooked failure point. Homeowners often assume a controller failure when the real culprit is a single broken or corroded common wire in the ground. If no zones work but the controller displays normally, suspect the common wire first.
Master Valve
A master valve is an automatic valve (typically solenoid-operated) installed where the irrigation system connects to the main water supply. It acts as a fail-safe. When the controller activates any zone, it simultaneously opens the master valve. When all zones are off, the master valve closes, cutting water to the entire irrigation system.
Why it matters for diagnosis: If a master valve fails, the entire system goes dead, not just one zone. Homeowners frequently misdiagnose this as a controller failure or a mainline break. To understand your system’s layout, check whether you have a master valve, because it changes your diagnostic approach entirely.
Flow Control Handle
An adjustable knob on the valve body that restricts maximum water flow through that zone. It’s meant for fine-tuning pressure and flow rates during installation.
Why it matters for diagnosis: If someone turned the flow control handle fully clockwise (closed), the valve will pass zero water regardless of whether the solenoid and wiring are working perfectly. Always check this before replacing parts. It’s a five-second fix that gets missed surprisingly often.
Valve Box
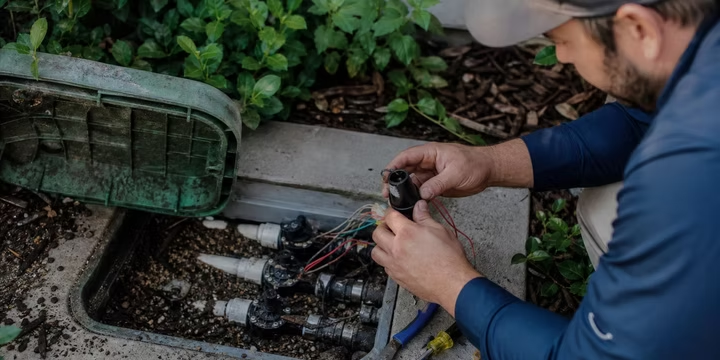
The plastic or concrete access box set into the ground that houses one or more valves. You’ll need to locate and open this box to perform any hands-on valve diagnosis.
Why it matters for diagnosis: Valve boxes fill with dirt, mud, and standing water over time, all of which accelerate corrosion on wire connections and solenoid components. A valve box that’s difficult to find or buried under sod delays every repair.
What’s Going Wrong: Symptom Terms and Their Most Likely Causes
Industry data shows that valve-stuck-open problems account for roughly 30% of all solenoid-related service calls, while zones that won’t activate represent another 40%. Here’s what each symptom typically points to.
Zone Won’t Turn On
The controller shows the zone running, but no water comes out of the sprinkler heads.
Most common causes: Failed solenoid (open circuit), broken field wiring or common wire, closed flow control handle, failed master valve, or a clogged pilot port preventing the diaphragm from opening.
Zone Won’t Shut Off
The zone keeps running after the controller moves to the next station or returns to idle, sometimes flooding the area.
Most common causes: Torn or debris-fouled diaphragm, stuck-open solenoid plunger, clogged exhaust port, or a wiring short that keeps the solenoid energized. For a focused walkthrough of this specific problem, see our valve stuck open guide.
Valve Weeping or Seeping When Closed
A small but constant trickle of water passes through the valve even when the zone is off. Heads may slowly ooze water between cycles.
Most common causes: Worn diaphragm seat, debris lodged on the sealing surface, degraded O-ring, or mineral buildup preventing a complete seal. This can also indicate an underground leak downstream of the valve.
Buzzing or Warm Solenoid
The solenoid hums audibly or feels warm to the touch when energized but the valve doesn’t open.
Most common causes: The solenoid is receiving power (confirming the controller and wiring are working) but the plunger is stuck, or internal debris is preventing it from opening the pilot passage. A solenoid that’s very hot rather than just warm may have a partially shorted coil that needs replacement.
Intermittent Zone Operation
The zone works sometimes but not consistently. It might run fine for three days and then fail on the fourth.
Most common causes: Corroded wire splice connections that make contact intermittently, a solenoid with a marginal coil (resistance drifting in and out of spec), or a valve with partial debris blockage that shifts position. This is one of the hardest problems to diagnose because the system can test fine at the exact moment you’re checking it.
Low Pressure on a Single Zone
The zone turns on, but the heads barely pop up or spray weakly.
Most common causes: Flow control handle partially closed, partially clogged valve body or pilot passages, a diaphragm that isn’t opening fully, or a leak in the lateral line between the valve and the heads. If you’re seeing low pressure across multiple zones, the issue is likely upstream. Our water pressure guide covers system-wide pressure diagnostics.
Water Hammer
A loud banging or shuddering in the pipes when a valve opens or closes.
Most common causes: A valve closing too quickly (often due to a weak or failing solenoid that can’t control the diaphragm descent smoothly), excessively high system pressure, or air trapped in the lines.
Two or More Zones Running Simultaneously
Only one station is active on the controller, but multiple zones are running at once.
Most common causes: A grounded wire (field wiring making contact with the earth or another wire), which energizes multiple solenoids at once. This often results in a blown fuse or tripped breaker at the controller. Practitioners on irrigation forums flag this as one of the clearest indicators of a wiring fault rather than a valve fault.
The Diagnostic Sequence: Testing and Method Terms
Here’s where the glossary becomes a decision tree. The order matters. Working from simple to complex saves time and prevents unnecessary part replacements.
The Manual Bleed Test (Start Here)
The manual bleed test is the single most important step when diagnosing valve and solenoid problems in irrigation systems. Open the bleed screw on the suspect valve by turning it counterclockwise (usually a quarter to half turn). If the valve opens and water flows normally to the heads, you’ve just confirmed that the valve body, diaphragm, and downstream piping are all fine. The problem is electrical: solenoid, wiring, or controller.
If the valve does not open when you bleed it manually, the fault is mechanical or hydraulic: clogged ports, stuck diaphragm, closed flow control handle, or no water reaching the valve.
This single test splits your diagnosis into two completely different paths. Practitioners on Reddit’s r/Irrigation community consistently recommend performing this test before touching a multimeter or opening the controller, and it contradicts the approach in many published articles that start at the controller and work outward.
One practical lesson from forum discussions: the valve may test fine mechanically, but a downstream blockage (a capped line, a crushed pipe) can mimic valve failure. If the bleed test produces water at the valve but nothing reaches the heads, investigate the lateral lines before buying valve parts.
Multimeter
A digital multimeter is an inexpensive handheld device (typically $15 to $30 at any hardware store) that measures voltage, resistance, and continuity. It is the single most useful tool for diagnosing electrical problems in an irrigation system.
You’ll use it for three specific tests described below.
AC Voltage Test (Controller Output)
With the zone active, place your multimeter probes on the controller’s terminal for that zone and the COM terminal. Set the meter to AC volts. You should read approximately 24V AC. If the voltage is correct at the controller but the zone doesn’t run, the problem is in the field wiring, the wire connections, or the solenoid, not the controller.
If you read zero volts, the controller’s triac (internal switch) for that station may be dead, or a fuse is blown.
Resistance / Ohm Test (Solenoid Coil)
Disconnect the solenoid wires and place the multimeter probes on the two solenoid leads. A functioning solenoid should read between 20 and 60 ohms, though the exact range varies by manufacturer. A reading near zero ohms indicates a short circuit (the coil windings are touching internally). A reading of infinite ohms (OL on the display) means an open circuit, the coil wire is broken inside.
Either extreme confirms a failed solenoid that needs replacement.
Continuity Test (Field Wiring)
This test checks whether your field wires have an unbroken path from the controller to the valve. Disconnect the wire at both ends (controller terminal and solenoid), then check for continuity. If the meter shows no continuity, you have a wire break somewhere underground.
Also test between each wire and ground (a metal stake in the soil). If you get continuity to ground, the wire insulation is damaged and the wire is “grounded,” which causes the shorts that energize multiple zones at once. For a complete guide to wiring faults, see our wire repair guide.
Solenoid Swap Test
If your multimeter readings are borderline or you don’t trust the numbers, swap the solenoid from the suspect zone with one from a zone that works. If the problem follows the solenoid to the new zone, the solenoid is bad. If the original zone still doesn’t work with the known-good solenoid, the issue is in the wiring or the valve body.
This is the fastest confirmation test when you’re uncertain about meter readings.
Kick-Start Test
Some controllers have a “test” or manual start function that activates each zone for a brief period (usually one to two minutes). Running this sequence confirms whether the controller can send signals to each station and helps you quickly identify which zones respond and which don’t.
Waterproof Wire Splice Failures
This is a critical concept that most diagnostic guides overlook. The wire connections between the solenoid leads and the field wiring must use waterproof, grease-filled wire connectors (sometimes called “gel-filled” wire nuts). Standard household wire nuts will corrode in a damp valve box, sometimes within a single season.
Here’s the subtle part: a corroded splice can test fine with a multimeter’s tiny test current but fail under the actual 24V AC load the solenoid needs. If your meter shows good continuity and correct voltage at the controller, but the solenoid still won’t fire, inspect the wire splices in the valve box. Pull them apart and look for green corrosion on the copper. This is a practitioner-level insight that explains many “ghost” failures.
Inside the Valve: Mechanical Diagnosis Terms
If the manual bleed test confirmed a mechanical problem (valve didn’t open even manually, or it won’t close), these are the internal issues to investigate.
Debris Blockage
Sand, dirt, and organic material can enter the valve body through the mainline, especially after a repair, a new installation, or a mainline break. Debris lodges in the pilot port, exhaust port, and diaphragm seat. Because the pilot port opening is extremely small, even a single grain of sand can block it and prevent the valve from opening.
Diagnostic step: Remove the bonnet (top) of the valve and inspect all ports and passages. Flush the valve body with water before reassembling. Irrigation training materials consistently rank debris as the number one cause of all valve failures.
Diaphragm Tear
A torn, cracked, or perforated diaphragm allows water to bypass the sealing surface, causing the valve to weep or fail to close completely. Inspect the diaphragm for wrinkles, tears, stiffness, or embedded debris on its sealing face.
Diagnostic step: With the bonnet removed, hold the diaphragm up to light. Any pinhole will be visible. Run your finger across the seat surface to feel for grit or mineral buildup.
Mineral Buildup and Hard Water Effects
This is especially relevant in West Texas and the Lubbock area, where municipal water is notoriously hard. Limescale forms on the diaphragm, inside pilot passages, and on the solenoid plunger tip. Over time, this buildup restricts flow through the tiny ports, stiffens the diaphragm, and prevents clean sealing.
Valves in hard water areas often fail years earlier than their rated lifespan. While most irrigation valves last 7 to 15 years depending on quality and maintenance, hard water can cut that window significantly. Soaking affected parts in white vinegar for 30 minutes can dissolve light mineral deposits, but heavy buildup usually means replacement.
No nationally ranking article on valve diagnosis addresses water quality as a failure accelerant, but for Lubbock homeowners, it’s one of the most common root causes.
O-Ring Failure
O-rings seal the connections between the bonnet, valve body, and solenoid port. A cracked or flattened O-ring allows water to leak externally (visible as water seeping from the valve top) or allows pressure to escape internally (preventing proper operation).
Diagnostic step: During any valve disassembly, inspect all O-rings for cracks, flattening, or hardening. They’re inexpensive and worth replacing preventively whenever you open a valve.
Pressure Imbalance
The valve relies on a precise pressure differential between the top and bottom of the diaphragm to open and close. Anything that disrupts this balance, a clogged port, a torn diaphragm, low supply pressure, or a partially closed flow control, can cause erratic operation. The valve might open sluggishly, close partially, or chatter (rapid open-close cycling).
For system-wide pressure concerns, our low pressure repair guide covers upstream causes and fixes.
Fix or Replace: Decision Terms and Cost Context
Solenoid Replacement
Replacing a solenoid is the most common valve repair. The solenoid unscrews from the valve body (no pipe cutting required), and a replacement typically costs $10 to $30 for the part. As one forum user on AnandTech noted when comparing the effort of sourcing individual internal parts: the whole valve is sometimes cheaper than buying the parts separately, making full replacement the practical choice when multiple components are worn.
Total time for a solenoid swap is usually 15 to 30 minutes for a homeowner with basic comfort around wiring.
Diaphragm Rebuild
Rebuild kits (diaphragm, springs, and O-rings) are available for most major valve brands and cost $8 to $20. A rebuild makes sense if the valve body is in good shape and the system is under 10 years old. For older valves or valves with visible corrosion on the body itself, replacement is a better investment.
Valve Replacement
Professional valve replacement typically costs $125 to $225 per valve for straightforward jobs, and $300 to $400 or more for complex situations (deep manifolds, hard-to-access locations, multiple valves). The work usually takes one to two hours per valve.
Most irrigation professionals recommend full replacement rather than repeated rebuilds once a valve passes the 10-year mark, especially in hard water areas where mineral damage compounds over time.
Manifold Replacement
If multiple valves in the same valve box are failing, replacing the entire manifold (the assembly of valves, fittings, and connections) is often more cost-effective than replacing valves one at a time. This is common in older systems where the original PVC fittings have become brittle.
For a detailed look at repair costs, see our valve repair cost guide.
When to Call a Professional
Some steps in diagnosing valve and solenoid problems in irrigation systems are well within DIY range. Others are not. Here’s where to draw the line.
DIY-Safe Steps
- Manual bleed test
- Visual inspection of valve box, solenoid, and wire connections
- Multimeter testing at the controller and solenoid
- Solenoid swap test
- Solenoid replacement
- Cleaning debris from valve internals
- Diaphragm replacement on accessible valves
Call a Pro For These
Wire tracing and locating: Finding a break in buried wire requires specialized equipment (wire locators, tone generators) that most homeowners don’t own. A professional can pinpoint the break location without excavating the entire wire run.
Recurring or intermittent failures: If you’ve replaced a solenoid and the zone still fails intermittently, the issue is almost certainly in the wiring or a corroded splice that passes bench tests but fails under load. These problems require systematic field diagnosis.
Master valve diagnosis: Because a master valve failure affects the entire system and is often buried in a hard-to-reach location near the water main, misdiagnosis here is costly. A professional can test the master valve circuit and inspect the valve without unnecessary excavation.
Multiple zones failing simultaneously: This usually points to a common wire break, a controller board failure, or a grounded field wire. All three require methodical isolation testing.
Flow monitoring and proactive detection: Smart controllers with flow sensors can identify valve problems, from stuck valves to slow leaks, before any visible symptoms appear. Setting up this kind of monitoring requires professional calibration.
If you’re seeing signs that your system needs professional attention, schedule an inspection sooner rather than later. Small valve problems become expensive emergencies when left alone.
Quick-Reference Diagnostic Cheat Sheet
Step 1: Manual bleed test. Does the valve open?
- Yes → Problem is electrical. Go to Step 2.
- No → Problem is mechanical. Check flow control handle, then disassemble and inspect diaphragm, ports, and O-rings. Look for debris and mineral buildup.
Step 2: Check voltage at controller. Is the controller sending 24V AC to that station?
- Yes → Problem is in the field wiring, wire connections, or solenoid. Go to Step 3.
- No → Controller issue. Check fuses, triac, or program settings.
Step 3: Test solenoid resistance. Is it between 20 and 60 ohms?
- Yes → Solenoid coil is likely fine. Inspect wire splices in the valve box for corrosion. Try a solenoid swap test.
- No (zero ohms) → Shorted solenoid. Replace it.
- No (infinite/OL) → Open coil. Replace it.
Step 4: Test field wiring continuity. Disconnect wires at both ends and check.
- Good continuity → Wire is intact. Revisit splice connections and solenoid.
- No continuity → Wire break. Call a professional for wire locating.
Frequently Asked Questions
How do I know if the problem is the valve or the solenoid?
Start with the manual bleed test. Open the bleed screw on the valve. If the valve opens and water flows to the heads, the valve’s mechanical components are fine and the problem is the solenoid, wiring, or controller. If the valve won’t open even manually, the issue is inside the valve body (debris, diaphragm, or closed flow control).
What should a good solenoid read on a multimeter?
A healthy irrigation solenoid reads between 20 and 60 ohms of resistance, depending on the manufacturer. Zero ohms means a short circuit. Infinite resistance (OL on the display) means the coil is broken internally. Either reading confirms the solenoid needs replacement.
Can a bad wire connection look fine but still cause problems?
Yes. This is one of the trickiest diagnostic scenarios. Standard (non-waterproof) wire nuts corrode inside a damp valve box and create weak connections that pass a multimeter’s tiny test current but fail under the 24V AC load the solenoid actually needs. Always use grease-filled, waterproof wire connectors for irrigation splices, and replace any connection showing green corrosion.
Why would every zone on my system stop working at once?
Three likely causes: a broken common wire (the shared return wire all solenoids use), a failed master valve (if your system has one), or a dead controller. Check the controller display first. If it looks normal and shows stations running, the common wire or master valve is the most probable cause.
Does hard water affect irrigation valves?
It does, significantly. Hard water deposits limescale on the diaphragm, inside pilot passages, and on the solenoid plunger. In areas like Lubbock and West Texas where water hardness is high, this buildup can cause valves to fail well before their expected lifespan. Regular valve inspections and occasional vinegar soaks on internal components help extend valve life.
How long do irrigation valves typically last?
Most irrigation valves last 7 to 15 years depending on the quality of the valve, the water quality in your area, usage patterns, and whether the system receives regular maintenance. In hard water areas, expect the lower end of that range without proactive cleaning.
Should I repair or replace a failing valve?
If the valve is under 10 years old and only needs a new solenoid or diaphragm, repair is cost-effective (parts typically run $10 to $30). If the valve is over 10 years old, has recurring problems, or shows corrosion on the body, full replacement ($125 to $225 professionally installed) is usually the smarter long-term investment.
Is it worth buying a multimeter just for irrigation diagnosis?
A basic digital multimeter costs $15 to $30 and handles the three key tests (voltage, resistance, continuity) needed for diagnosing valve and solenoid problems in irrigation systems. It pays for itself the first time it saves you from replacing a good solenoid when the real problem was a broken wire. It’s also useful for dozens of other household electrical tasks.