
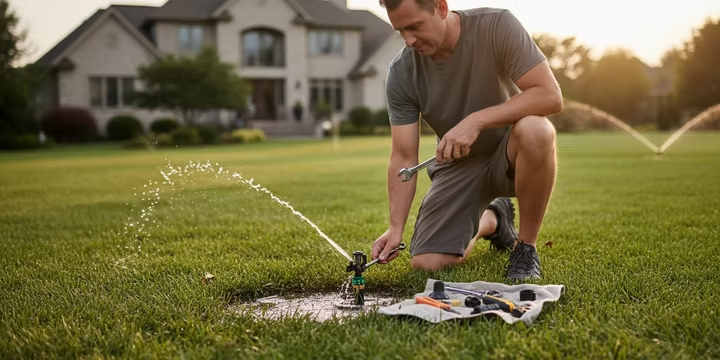
A healthy, green lawn is the goal, but when your sprinklers start sputtering instead of spraying, something is wrong. Low water pressure is one of the most common irrigation headaches, turning efficient watering into a frustrating waste. If you’re dealing with a Rain Bird sprinkler system low pressure problem, don’t panic. You can often fix it by cleaning clogged heads, ensuring all water valves are fully open, or identifying and repairing leaks in the line.
Most issues are fixable without calling in a pro. This guide walks through the full troubleshooting process, from five minute checks to deeper system repairs. We’ve also added sections on valve flow control adjustment, measuring pressure at the head, pressure regulating hardware, and fixes specific to impact sprinklers, topics that practitioners on Reddit and irrigation forums consistently flag as overlooked.
Whether you’re seeing dry spots or heads that won’t pop up, this will help you diagnose the problem and get your system back to peak performance.
Need a pro to handle it?Get a sprinkler repair estimate from an experienced irrigation company in the Lubbock area.
Step 1: Diagnosing the Problem and Spotting the Signs
Before you start digging or taking things apart, play detective. A proper diagnosis saves hours of work by pointing you to the right area of your system.
Signs of Low Water Pressure in Your Sprinkler System
How do you know if you actually have a pressure problem? Look for these classic symptoms:
- Weak or Sputtering Spray: The most obvious sign. Water may just bubble out of the heads or spray a much shorter distance than usual.
- Sprinkler Heads Don’t Pop Up: The heads might rise slowly, only come up partway, or not emerge from the ground at all. The pressure simply isn’t strong enough to lift them.
- Uneven Watering and Dry Patches: When sprinklers can’t throw water as far as designed, you’ll start seeing brown, dry spots. Our guide on why sprinklers leave dry spots covers this in detail.
- Rotor Heads Stop Turning: Sprinklers like the Rain Bird 5000 series rely on water pressure to rotate. If they stop turning, low pressure is a likely culprit.
How to Diagnose Low Water Pressure
Once you’ve confirmed the signs, narrow down the cause. The key question: is the problem system wide or zone specific?
- System Wide Problem: If every single zone has low pressure, the issue is likely close to the water source. This could be a partially closed valve, a problem with your main water supply, or a major leak in the main line.
- Zone Specific Problem: If only one zone is weak while others work perfectly, you’ve isolated the issue. The problem lies somewhere within that specific zone, whether it’s the valve, a pipe, or the heads themselves. This is a common scenario when troubleshooting a Rain Bird sprinkler system low pressure issue.
How to Measure Pressure at the Sprinkler Head
You can guess at pressure problems all day, but measuring removes the guesswork entirely. A simple pitot tube pressure gauge (available at most hardware stores for under $15) threads directly onto a sprinkler head after you remove the nozzle. Turn on the zone and read the gauge.
According to Rain Bird’s own specifications, their 5000 series rotors are designed to operate at 25 to 65 PSI, with optimal performance around 45 PSI. Most residential spray heads perform best between 30 and 50 PSI. If you’re reading below 25 PSI at the head, you’ve confirmed a real pressure deficit.
Practitioners on Reddit’s r/Irrigation forum regularly recommend taking readings at both the closest and farthest heads from the valve. A large drop between the two suggests friction loss in undersized pipe, while uniformly low readings across the zone point upstream to the valve or water source. This simple test takes five minutes and tells you exactly where to focus your effort.
Step 2: Checking for Easy Fixes You Can Do Yourself
Many causes of low pressure are surprisingly simple to fix. Always check these common culprits before calling a professional.
Clogged Sprinkler Heads and Nozzles
This is the number one cause of localized low pressure. Over time, dirt, grass clippings, and mineral buildup block the small openings in your sprinkler nozzles.
- How to Spot It: A single head is sputtering or not spraying while others in the same zone work fine.
- How to Fix It: Turn off the system. Unscrew the nozzle from the top of the sprinkler head. You can often clean it by rinsing under a faucet. For stubborn clogs, use a thin wire or paperclip to clear the opening. For hard water mineral buildup, soaking the nozzle in a 50/50 mix of white vinegar and water for an hour dissolves the deposits. In West Texas, where hard water is common, this is routine maintenance. Our clogged sprinkler head guide walks through the full process.
Simple Sprinkler Head Adjustments
Sometimes the issue isn’t a clog but an adjustment. Sprinkler heads like the popular Rain Bird 5000 rotor are highly adjustable.
- Adjusting the Radius Screw: Most sprinkler heads have a small screw on top. Turning this screw clockwise reduces the spray distance and flow. If it’s turned too far, it can almost completely block the water. Try turning it counterclockwise to see if that restores the flow. You can typically reduce the radius by about 25% with this screw before affecting the spray pattern. For step by step visuals, see our sprinkler nozzle adjustment guide.
- Rain Bird 5000 Nozzle Orifice Selection: The Rain Bird 5000 series comes with interchangeable nozzles, each with a different sized opening (orifice) to control flow rate and distance. If the wrong nozzle is installed, it can disrupt the pressure for the entire zone. Ensuring the correct nozzle is installed for the area it needs to cover is key to a balanced system.
Check Your Controller Schedule
A simple programming error can mimic a pressure problem. Your system is designed to run only one zone at a time. If your controller is accidentally scheduled to run two zones simultaneously, they will split the available water, causing both to have extremely low pressure. Double check your controller to prevent an overlapping zone schedule, or follow our irrigation controller troubleshooting guide. Make sure each zone’s start time allows the previous zone to finish completely.
Valve Flow Control Adjustment
This is one of the most overlooked causes of low pressure, and it takes about ten seconds to check. Most Rain Bird valves (and many other brands) have a flow control handle or stem on top of the valve body. It looks like a small knob or screw sitting above the solenoid. When this flow control is partially closed, it restricts water to that zone just like a partially closed faucet.
To check it, locate the valve box for the affected zone. Look for the flow control stem, usually right next to the solenoid. Turn it counterclockwise until it stops. That’s the fully open position. Then turn it back about a quarter turn clockwise. This prevents the stem from vibrating loose while still allowing maximum flow.
One irrigation technician in a YouTube walkthrough demonstrated that a flow control turned just two full turns inward cut zone pressure nearly in half. It’s the kind of thing a previous homeowner or contractor might have adjusted and forgotten about. Checking every valve’s flow control should be the very first thing you do if a single zone is underperforming.
Step 3: Investigating Deeper System Issues
If the easy fixes didn’t solve your Rain Bird sprinkler system low pressure problem, it’s time to look at more significant issues with your system’s hardware and plumbing.
Problems at the Water Source
If all zones are weak, start where the water enters your system.
- Main Water Supply Pressure Check: Verify that your main shutoff valve for the sprinkler system is fully open. The same goes for the valves on your backflow preventer. A partially closed valve will choke the water supply for the entire system. According to the EPA’s guidance on residential water systems, typical municipal supply ranges from 40 to 80 PSI, but it can drop significantly during peak summer demand.
- Adjusting the Water Supply Pressure: If you consistently have low pressure, especially during summer mornings when everyone in the neighborhood waters at once, a booster pump can increase pressure to the ideal 30 to 50 PSI range at the head. A professional can size the pump correctly for your system’s flow requirements.
Leaks, Breaks, and Blockages in the Pipes
A leak is a primary cause of pressure loss because water escapes before it reaches the sprinkler heads.
- Sprinkler System Leak Detection: Look for telltale signs: soggy or muddy spots in the yard, areas where the grass is unusually green and lush, or water pooling around a sprinkler head long after the system has run. A sudden spike in your water bill is another major red flag. For a thorough walkthrough, see our underground leak detection guide.
- Repairing a Broken Pipe or Riser: If you find a leak, the section of pipe will need to be repaired. This usually involves digging up the broken area, cutting out the damaged section, and splicing in a new piece of pipe with couplings.
- Inspecting Lateral Lines for Blockage or Crushed Pipes: A zone’s underground pipes (lateral lines) can be crushed by tree roots or heavy equipment. Roots are a very common culprit; they slowly squeeze a pipe and restrict water flow. If you suspect a crushed pipe, the only solution is to dig it up and replace the damaged section. Because tree roots are a frequent cause, working with an irrigation company that also has a certified arborist, like M&M Sprinklers in Lubbock, can solve both the plumbing and the tree problem at once.
Malfunctioning Sprinkler Valves
Each zone is controlled by a valve. If a valve doesn’t open all the way, that zone will be starved for water.
- Valve Issue Diagnosis: If one zone is consistently weak, the valve is a primary suspect. Debris can get stuck inside, or internal parts can wear out.
- Fixing a Valve Diaphragm or Solenoid: The two most common failure points are the rubber diaphragm and the electrical solenoid. A torn diaphragm prevents the valve from opening or closing properly. A faulty solenoid won’t get the signal to open. These parts can often be replaced without replacing the entire valve. Here’s how to replace a sprinkler valve solenoid.
- Electrical Issues Affecting Valve Opening: Sometimes the valve is fine but the wiring to it is not. A corroded or broken wire can prevent the solenoid from getting enough power to fully open the valve. This results in a zone that either won’t turn on or has very low pressure.
Valve Diaphragm Sticking Under Low Flow or Low Pressure
This is a subtler problem that catches a lot of people off guard. Zone valves rely on a pressure differential across the diaphragm to open fully. When incoming water pressure is already marginal (say, under 30 PSI), the valve may only crack open partway instead of snapping fully open. The result looks identical to a pressure problem, even though the real issue is a sluggish valve.
Debris lodged in the diaphragm’s bleed port is often the cause. Even a tiny grain of sand can prevent the port from functioning properly. To fix this, shut off the water supply to the system, remove the valve bonnet (the top portion held on by screws), and carefully inspect the diaphragm. Clean the small bleed port hole with a toothpick or compressed air. While you’re in there, check the diaphragm itself for warping or hardening, which is common in older systems that have baked through years of West Texas summers.
Forum discussions on irrigation boards frequently mention that Rain Bird DV series valves are particularly susceptible to this when water quality is poor. If the diaphragm has lost its flexibility, replace it. A new diaphragm kit costs a few dollars and can completely restore a zone that seemed to have a chronic pressure problem.
System Design Flaws
In some cases, a Rain Bird sprinkler system low pressure issue is caused by how the system was designed or later modified.
- Too Many Sprinkler Heads Per Zone: Every zone is designed to handle a specific number of heads based on available water flow (gallons per minute). If you add too many sprinklers to a single zone, pressure drops for all of them because demand exceeds supply. Learn more in our irrigation system design guide.
- Balancing Zones and Redistributing Heads: The solution for an overloaded zone is to rebalance the system. This might mean moving some heads to another zone or creating a new zone entirely, ensuring no single valve is trying to do too much work.
- Elevation Induced Pressure Loss: Water pressure is affected by gravity. You lose approximately 0.43 PSI for every foot of elevation the water has to climb. If your yard has a significant slope, the sprinklers at the top will have lower pressure. A professional design accounts for this by zoning sloped areas separately or using booster pumps.
Step 4: Pressure Regulation Solutions for Chronic Low Pressure
When you’ve fixed the obvious problems but pressure still isn’t where it should be, or when pressure fluctuates wildly throughout the day, it’s time to think about regulation hardware.
Installing a Pressure Regulator at the Valve
A pressure regulator installed downstream of the zone valve ensures consistent delivery to the heads regardless of what the municipal supply is doing. This is especially valuable in areas where city water pressure swings between 50 and 90 PSI depending on the time of day.
For low pressure situations specifically, a regulator won’t create pressure that isn’t there, but it does prevent the spikes and drops that cause uneven performance. Some newer Rain Bird valves like the PESB series come with built in pressure regulation. If you’re replacing a valve anyway, choosing a pressure regulating model kills two birds with one stone.
Considering a system upgrade?Explore what a full irrigation checkup covers to see if your system would benefit from regulated valves.
Using Pressure Regulating Spray and Rotor Heads
Rain Bird manufactures spray bodies and rotors with built in pressure regulation, and they’re one of the most effective upgrades for systems dealing with inconsistent pressure. The Rain Bird 1800 PRS (Pressure Regulating Stem) spray body, for example, regulates inlet pressure down to a consistent 30 PSI at the nozzle. This eliminates misting from high pressure while ensuring the nozzle performs at its designed radius.
For rotor heads, the Rain Bird 5000 Plus PRS model regulates to 45 PSI. According to Rain Bird, pressure regulated heads can reduce water waste by up to 30% compared to non regulated bodies operating at excessive pressure.
These heads are a direct retrofit. The body dimensions match standard non PRS models, so you can swap them in without digging or replumbing. Practitioners in irrigation forums consistently call PRS bodies one of the single best upgrades for older systems, particularly in neighborhoods where municipal pressure has crept higher over the years as infrastructure has been upgraded.
The cost difference is typically only $1 to $3 more per head compared to standard bodies, making this one of the cheapest performance upgrades available.
Step 5: Impact Sprinkler Spring Adjustment for Low Pressure
If your Rain Bird system uses impact sprinklers (the classic “chk chk chk” heads common on larger residential lots and commercial properties), low pressure creates a specific problem: the spring that drives the deflection arm may be too strong for the available water flow.
Impact sprinklers rotate because a spring loaded arm swings into the water stream, deflecting the head slightly with each pass. When pressure is adequate, this works perfectly. When pressure drops, the water stream doesn’t have enough force to push the arm back against the spring, and the head either stops rotating or rotates in jerky, incomplete arcs.
The fix is straightforward. Most impact sprinklers have an adjustable spring tension. Locate the spring clip or tension screw on the deflection arm and reduce the tension slightly. On Rain Bird impact models, this is usually a matter of repositioning the spring to a lighter tension notch. Less spring resistance means the head can rotate on lower pressure.
A few important notes. Reducing spring tension too much causes the head to rotate too quickly, which reduces the amount of water applied per pass. Finding the right balance takes a bit of trial and error. Start by reducing one notch and observe a full rotation cycle. Our guide on impact sprinklers not rotating covers additional causes and fixes for these heads.
Also check the bearing washer at the base of the impact head. A worn or gritty bearing creates extra friction that mimics low pressure symptoms. Cleaning or replacing the bearing washer often restores smooth rotation without touching the spring at all.
Step 6: Proactive Maintenance to Prevent Low Pressure
The best way to deal with low pressure is to prevent it from happening in the first place. A little proactive care goes a long way.
Routine Flushing and Filter Maintenance
Flushing your lines annually helps clear out any dirt or debris that has accumulated. Most systems also have a filter near the main connection that should be cleaned periodically to prevent small particles from reaching your sprinkler heads and valve diaphragms.
Regular Seasonal Inspections
A professional seasonal inspection is one of the smartest investments for an irrigation system. A technician can spot potential problems like developing leaks, failing valves, or clogged heads before they cause major issues. For homeowners in Lubbock and the surrounding West Texas communities, a maintenance plan can ensure your system is always ready for the heat.
Pressure Regulation as Preventive Care
If your home’s water pressure is very high or fluctuates significantly, it can damage sprinklers over time, wearing out seals, cracking bodies, and blowing out diaphragms faster than normal. Installing a pressure regulator (whether at the main supply, at each valve, or through PRS spray bodies) ensures your system always receives water at a safe and optimal pressure. This prevents both low pressure performance issues and high pressure damage.
Tired of chasing pressure problems?Contact M&M Sprinklers for a professional system evaluation and get the right fix the first time.
Quick Reference: Low Pressure Causes and Fixes
Frequently Asked Questions
Why does only one of my sprinkler zones have low pressure?
If only one zone is weak, the problem is almost certainly located within that zone. The most common causes are clogged sprinkler heads, a malfunctioning zone valve that isn’t opening fully (check the flow control stem first), or a hidden leak in that zone’s piping. A sticking diaphragm is another frequent culprit, especially in older systems.
Can a clogged nozzle really affect my entire Rain Bird sprinkler system’s pressure?
A single clogged nozzle will only affect that one head. However, if multiple heads in a zone become clogged with hard water minerals or debris, it can appear as though the whole zone has a Rain Bird sprinkler system low pressure problem.
How do I measure the actual pressure at my sprinkler head?
Remove the nozzle from a sprinkler head and thread on a pitot tube pressure gauge. Turn on the zone and read the gauge. Compare your reading to Rain Bird’s recommended operating pressure for that head model (typically 30 to 50 PSI for spray heads, 25 to 65 PSI for rotors). Taking readings at multiple heads in the zone helps pinpoint where pressure is being lost.
How do I know if I have a leak in my sprinkler system?
The biggest clues are soggy spots in your yard, water bubbling up from the ground, or an unexpectedly high water bill. You can also check your water meter. Turn off all water inside and outside your house, then watch the meter. If it’s still moving, you likely have a leak somewhere.
What are pressure regulating spray bodies, and are they worth installing?
Pressure regulating spray bodies (like the Rain Bird 1800 PRS) have a built in mechanism that maintains a consistent output pressure regardless of incoming pressure fluctuations. They cost only $1 to $3 more per head than standard bodies and can reduce water waste by up to 30%. For most systems, especially older ones dealing with inconsistent pressure, they’re one of the best value upgrades available.
Is it difficult to replace a sprinkler valve solenoid?
For someone with basic DIY skills, replacing a solenoid is usually straightforward. Turn off the water, unscrew the old solenoid, and screw in the new one, making sure to connect the wires properly. However, if you’re not comfortable with plumbing or electrical work, it’s best to contact an irrigation professional.
What is the ideal water pressure for a Rain Bird sprinkler system?
Most residential sprinkler systems, including those with Rain Bird components, operate best when the pressure at the sprinkler head is between 30 and 50 PSI. Pressure that is too low results in poor coverage, while pressure that is too high causes misting and water waste. Pressure regulating hardware helps keep you in that sweet spot regardless of supply conditions.