Hunter Irrigation Head Adjustment: 2026 Step-by-Step
- M&M Sprinklers Team
- 2 days ago
- 9 min read

TL;DR
Most people searching for Hunter irrigation head adjustment need to fix a rotor (PGP or I-20) that’s spraying too wide, too narrow, or in the wrong direction. You need the white Hunter wrench, about five minutes, and the system running so you can see what you’re doing. This guide gives you the exact steps for rotors first, then covers spray heads and MP Rotators. If you’re in West Texas, there are a few extra things to watch for (hard water buildup, mineral grit) that we cover below.
What You Need Before You Start
Grab these before you walk out to the yard:
Hunter adjustment wrench (white plastic tool, comes with most Hunter heads). One end is a plastic key for arc adjustment, the other is a 3/32-inch hex key for radius.
Small flathead screwdriver (for spray heads and MP Rotators)
A toothpick or small pick (for cleaning debris out of hex sockets, common in Lubbock’s hard water)
3/32-inch Allen key (backup if you’ve lost the Hunter wrench, works for radius only)
Don’t have the Hunter wrench? You can pick one up at most hardware stores in Lubbock or order online. Without it, you can’t adjust the arc on rotors.
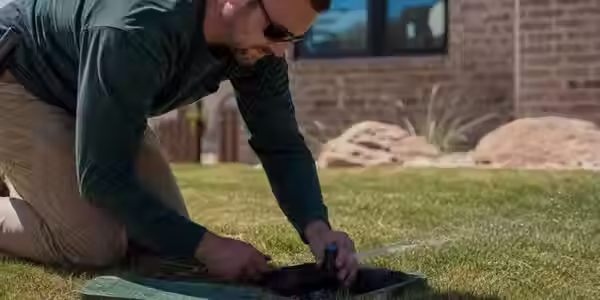
Important first step: Turn on the zone so the head pops up and you can see exactly where water is landing. You need to watch the pattern while you work.
If your system has bigger issues beyond simple adjustment (zones not turning on, heads not popping up), check for sprinkler problems first.
How to Identify Your Hunter Head Type
Look at the head while it’s running. This takes about two seconds:
Rotor (PGP, PGP Ultra, PGJ, I-20, SRM): Rotates back and forth. Covers a large area (17 to 46 feet). Has a rubber cap on top with small holes. This is the most common head in Lubbock yards.
Spray head (Pro-Spray with fixed or adjustable nozzle): Pops up and sprays a fan-shaped pattern. Doesn’t rotate. Covers smaller areas like garden beds and narrow strips.
MP Rotator: Mounts on a spray body but shoots multiple rotating streams. Looks different from both rotors and spray heads.
Not sure which type you have? Our guide to irrigation head types has photos.
Most Lubbock yards use rotors for the main lawn and spray heads or MP Rotators for smaller areas. If you’re only going to read one section, read the rotor section next.
How to Adjust a Hunter Rotor (PGP, PGP Ultra, I-20)
This covers the three things you can change on a Hunter rotor: the arc (how wide it sprays), the radius (how far it throws), and the direction (where the pattern points).
Step 1: Find the Right Stop
Every Hunter rotor swings back and forth between two boundaries. The right stop is the fixed boundary. It doesn’t move when you adjust the arc. The left stop is the adjustable side.
With the zone running, watch the head rotate. When it reaches its rightmost point and reverses direction, that’s the right stop. You need to know where this is before you do anything else.
Step 2: Adjust the Arc (How Wide It Sprays)
The arc is the total degrees of coverage. A half circle is 180 degrees. A full circle is 360.
Hold the nozzle turret (the rotating top part) and manually turn it all the way to the right stop. Hold it there.
Insert the plastic end of the Hunter wrench into the arc adjustment socket. This is the slot marked with a “+” and “−” on some models. Don’t confuse it with the hex screw (that’s for radius) or any other opening.
To widen the arc: Turn the wrench clockwise. One full turn of the wrench adds 90 degrees.
To narrow the arc: Turn counterclockwise. One full turn removes 90 degrees.
So if you want to go from a half circle (180°) to a full circle (360°), that’s two full clockwise turns of the wrench.
The most common mistake: Not holding the turret at the right stop while adjusting. If you skip this, the right stop shifts and your whole pattern moves to the wrong spot. This is the number one reason people think their adjustment didn’t work.
Step 3: Adjust the Radius (How Far It Throws)
Find the radius adjustment screw on top of the head. It’s a small hex screw.
Insert the hex end of the Hunter wrench (or a 3/32-inch Allen key).
Turn clockwise to reduce the throw distance.
Turn counterclockwise to increase it (back toward factory max).
Critical rule: Never turn this screw more than five full clockwise turns. Past that point, the screw can drop inside the head body. When that happens, water streams out in a thick column instead of spraying. The head is usually ruined. One homeowner on Houzz described this exact problem with an I-20 and ended up needing a full head replacement.
If you need more than about 25% reduction in throw distance, don’t keep cranking the screw. Swap to a smaller nozzle instead. Here’s how to go about replacing a sprinkler nozzle.
Step 4: Change the Direction (Reposition the Right Stop)
If the head is spraying in the completely wrong direction (hitting the driveway instead of the lawn, for example), you need to move the right stop.
Turn the body cap counterclockwise and pull the internal assembly out of the body.
Rotate the nozzle turret to the right stop position.
Point the nozzle where you want coverage to start.
Reinsert the assembly and screw the body cap back on clockwise.
You don’t need to dig up the head for this. Everything happens at the top.
I-20 Bonus Feature: FloStop
If you have Hunter I-20 rotors, there’s a feature called FloStop that lets you shut off flow at a single head while the rest of the zone keeps running. Insert the Hunter wrench into the center hole of the rubber cover and turn clockwise until the water stops. This is handy when you’re testing or adjusting one head at a time and don’t want to get soaked by the others.
How to Adjust a Hunter Spray Head
Spray heads are simpler than rotors. No wrench needed for most adjustments.
Change the Direction
Grip the nozzle and twist. Hunter spray bodies have a built-in ratcheting mechanism that clicks as you rotate, so the nozzle stays where you put it. No tools required.
If the ratchet won’t click (it sticks instead of rotating), dirt or sand is probably jammed in the mechanism. Flush it with clean water. Practitioners on TheLawnForum report this fixes it most of the time. If flushing doesn’t work, unscrew the cap, lift and rotate the riser manually, then screw it back down.
Adjust the Arc
Hunter adjustable spray nozzles come preset to 90 degrees. To change the arc:
Find the arc adjustment ring on top of the nozzle.
Turn it counterclockwise to widen the pattern.
Turn clockwise to narrow it.
You do this by hand. No tools.
Adjust the Radius
Use a small flathead screwdriver on the center screw. Clockwise to reduce, counterclockwise to increase.
How to Adjust a Hunter MP Rotator
MP Rotators look and work differently from both rotors and spray heads. They mount on spray bodies but produce multiple rotating streams that apply water slowly (about 0.4 inches per hour). Because they water slowly, zones with MP Rotators need to run two to three times longer than standard spray zones.
Change the Direction
Same as spray heads. Grip and twist the riser. The ratcheting mechanism clicks into position.
Adjust the Arc
MP Rotators have small edge tabs on the nozzle.
Pull the tabs apart to widen the arc.
Push the tabs together to narrow it.
This is fiddly work. One DIYer on AroundTheYard recommended avoiding the MP1000 model for this reason, suggesting the MP2000 turned down instead since it throws nearly the same distance with better adjustability.
If you have more than a couple MP Rotators, buy the MPTOOL. It makes gripping those tiny tabs much easier than fingers or a screwdriver.
Adjust the Radius
Turn the center screw with the MPTOOL or a small flathead. Clockwise reduces distance, counterclockwise increases it.
For a more detailed walkthrough on MP Rotators specifically, see our MP Rotator adjustment guide.
Quick Tool Reference
Common Mistakes to Avoid
Adjusting the Wrong Hole on a Rotor
Rotors have multiple openings on top: the arc adjustment socket, the radius hex screw, and sometimes a lifting socket. They sit close together. Inserting the wrong end of the wrench into the wrong hole does nothing at best and strips components at worst. Take a second to identify which opening is which before inserting anything.
Skipping the Right Stop on Arc Adjustments
Worth repeating: always hold the turret at the right stop before adjusting the arc. If you don’t, the entire spray pattern shifts to the wrong area.
Blaming the Head When Pressure Is the Real Problem
If a single head throws short, it’s probably an adjustment issue. If every head on the zone is falling short, the problem is almost certainly low system pressure, not individual settings. Check our guide on low water pressure fixes before spending an afternoon tweaking screws that won’t solve anything.
Not Flushing After Working on Heads
Opening a head introduces dirt into the gear mechanism. Let the zone run for a minute or two after you finish adjustments. If you skip this, debris can get pushed deeper into the gears, which leads to a rotor that stops rotating entirely.
Confusing Adjustment with Nozzle Replacement
Turning the radius screw reduces throw distance by about 25% max. If your head needs to cover a fundamentally different distance or flow rate, you need a different nozzle, not more turns of the screw.
West Texas: Extra Things to Watch For
Lubbock and surrounding towns (Levelland, Plainview, Brownfield, and everywhere in between) have conditions that make Hunter irrigation head adjustment a little trickier than the manufacturer’s guides suggest.
Hard water buildup. The mineral-heavy water common across West Texas packs debris into hex sockets faster than softer water areas. If your radius screw won’t turn, pry off the rubber cap on top of the PGP (it takes some force, as three small grommets hold it) and clean the socket with a toothpick. A real estate developer managing 200 PGP heads on a forum described this as the most common issue he dealt with.
Gritty alkaline soil. Fine grit jams ratcheting mechanisms on spray heads and MP Rotators. Flushing with clean water usually fixes it.
Wind. West Texas wind means arcs often need to be tightened to prevent overspray onto sidewalks and driveways. This puts adjustment screws through more use and wear.
Seasonal drift. A head that was perfectly adjusted in April may need correction by July. The combination of mineral buildup and wind exposure shifts things over time. Checking your heads at least twice during the watering season is worth the few minutes it takes.
When to Call a Pro
Hunter irrigation head adjustment is straightforward DIY work most of the time. But some situations call for professional help:
The radius screw dropped inside the head body (the head needs replacement)
The hex socket is stripped and the wrench just spins
The gear drive grinds or the head won’t rotate at all
Multiple heads on a zone underperform (likely a pressure or design issue)
You keep tightening arcs to avoid hitting a walkway, which usually means the head was placed wrong, a design flaw that adjustment can’t fix
Learn what repairs typically cost so you can decide whether the DIY effort is worth it or if it makes more sense to have someone handle it.
Frequently Asked Questions
What tool do I need to adjust a Hunter PGP rotor?
The white Hunter adjustment wrench. Plastic end for arc changes, 3/32-inch hex end for radius. If you’ve lost the wrench, a standalone 3/32-inch Allen key works for radius only, but you’re stuck on arc adjustment without the plastic key.
How do I change the direction a Hunter rotor sprays?
Reposition the right stop. Turn the body cap counterclockwise, pull out the internal assembly, rotate the nozzle turret to the right stop, aim it where you want coverage to start, and reinsert. No digging required.
Can I adjust a Hunter spray head without any tools?
Mostly. You can ratchet the riser by hand to change direction and turn the arc ring by hand. Radius reduction requires a small flathead screwdriver for the center screw.
How many wrench turns change the arc by 90 degrees?
One full turn of the Hunter wrench equals 90 degrees of arc change. Two full turns takes you from 180° to 360°.
What happens if I turn the radius screw more than five times?
The screw falls into the head body. Water streams out in a thick, uncontrolled column. The head typically needs to be replaced at that point.
Why won’t my radius screw turn?
Debris in the hex socket, which is especially common in West Texas due to hard water. Pry off the rubber cap and clean the socket with a toothpick or small pick.
Do MP Rotators adjust the same way as rotors?
No. Completely different. MP Rotators use edge tabs for arc (pull apart to widen, push together to narrow) and a center screw for radius. Rotors use the Hunter wrench in specific sockets. Different tools, different technique.
How do I know if my problem is adjustment or something else?
One head spraying wrong? Probably adjustment. Every head on the zone falling short? Probably low system pressure or a valve issue. Adjustment won’t fix system-wide problems.
For a broader overview of irrigation terms beyond Hunter-specific adjustments, check the full irrigation glossary.


Comments